DIY LED matrix clock
Do you want to learn how to make a clock like this? It is very simple.
You will need:
- MAX7219 LED matrix and female to female cables (link aliexpress)
- ESP8266 NodeMcu v3 CH340 (link aliexpress)
- USB Cable
- Arduino IDE software (windows)
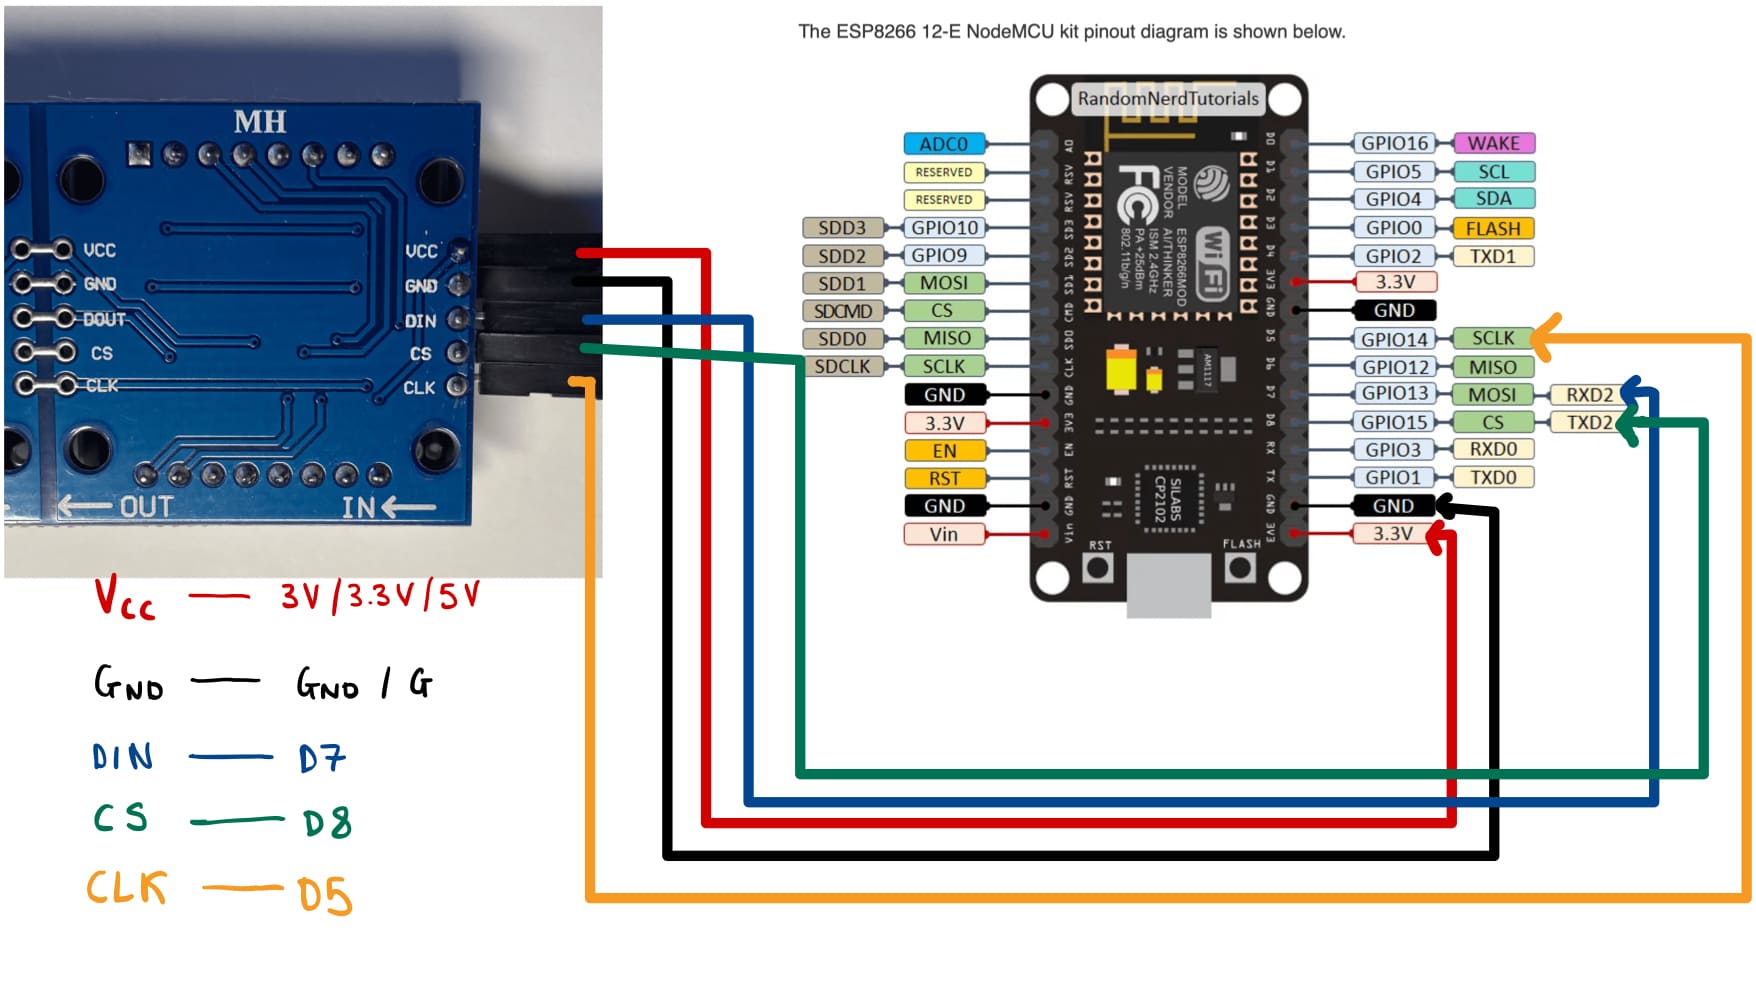
First step. connections
Once you have all the components, you have to connect them. To do this, follow the following scheme1, it is very simple:
Now, connect the ESP8266 to your computer with the USB cable.
Second step. Drivers
When you plug it in, the drivers for your board should have been automatically installed in Windows. To check, open device manager -> Ports (COM and LTP) -> you should see USB-SERIAL CH340 (COM X). If after restarting your computer it does not detect the board, you can download the drivers manually here.
Third step. Download source files
I have created a repository on github with the code for the clock. The code is not mine, I found it on this web and I have modified a few things. Go ahead and download it to your computer.
Fourth step. Arduino IDE
Now, you have to configure the Arduino development environment to be able to work with the esp8266. To do this, you have to follow the steps specified in the original repository.
- The software must be version 1.8.9 or later.
- Go to File -> Preferences -> Additional Boards Manager URLs
- Paste the following link:
https://arduino.esp8266.com/stable/package_esp8266com_index.json - Go to Tools -> Board -> Boards Manager
- Search for esp8266 and install it.
Once the process is complete, you can now select the correct board. Go to Tools -> Board -> esp8266 -> NodeMCU 1.0 (ESP-12E Module).
Fifth step. upload the code
Open the BIG_Clock_ESP8266.ino file with Arduino IDE.
Find this piece of code:
| |
Write the name of your WiFi network and password, as well as the UTC offset of your country (a quick google search will tell you).
Once we have our information correctly, the selected board, in the correct port, we can hit the upload button! If everything went well, you should have your new DIY LED clock perfectly functional. 😃
Sixth step?
With this hardware it is not only possible to make this project, but hundreds. I encourage you to continue discovering them!