Free Static Hosting: Hugo + GitHub Pages + Cloudflare
Github offers hosting for static websites completely free of charge. It has some limits but they are fairly good. In this post I will teach how to host static web pages generated with Hugo on GitHub Pages and how to automatically deploy when a change is made. Finally I will also teach how to add a custom domain using Cloudflare.
Anecdote: in the last month I have created two small personal projects with their respective static web pages, however I have paid hosting servers to host them. Because? I have no idea. I knew about the existence of this GitHub Pages service but for some reason it didn’t occur to me to use it!!
GoHugo
Hugo is one of the most popular open-source static site generators. In my case, I love it because it’s very easy to use and there are many templates to choose from. In my case, I am not specialized in developing web pages, so I use Hugo not only to create this personal page of mine, but also for the small projects I do.
If you don’t have a website yet and you don’t know how to use Hugo, I recommend that you search the internet for tutorials to do it, since in this post I’m not going to stop at explaining everything.
Once you have your site generated with Hugo:
- Create a new repository on GitHub.
- Upload your Hugo site files to the repository.
GitHub Pages
To start hosting the web on GitHub Pages, follow these steps:
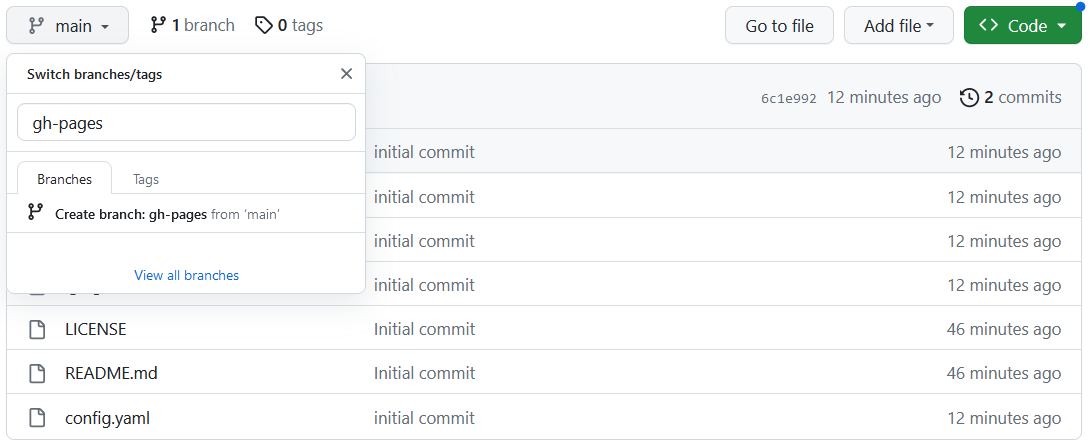
1. Create a branch called “gh-pages”
This step is required for automatic deployment of GitHub Actions. It is a special branch that GitHub uses for GitHub Pages.
2. Set permissions
Go to Settings -> Actions -> General -> Workflow permissions and enable “Read and write permissions”.
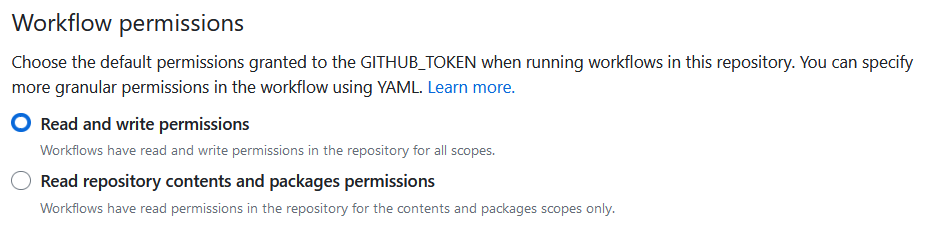
Don’t forget to hit the save button!
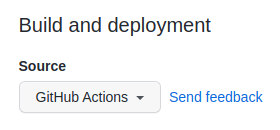
3. Set the deployment by GitHub Actions
Go to Settings -> Pages and set the deployment source to GitHub Actions.
4. Create the GitHub Actions configuration file
In your working directory, create a folder called .github and inside it create another folder called workflows. Inside the latter, create a file called deploy.yml and copy the following into it:
| |
(Obtained from official Hugo documentation)
5. Deploy
Once you have done the previous steps, all that remains is to deploy the web. To do this, upload the changes made (creation of the deploy.yml file) to the repository by making a commit and then a push. Automatically when the push is done, the GitHub Action will be triggered, which will generate and deploy the web in the gh-pages branch.
Custom Domain and Cloudflare
By default, you can access the web from https://user.github.io/repository which is totally free. However, if you want to use your own domain, you must follow the following steps. Please note that I am going to use Cloudflare as the DNS server for my domain, but this is not compulsory in order to use a custom domain with GitHub Pages. You can use any other provider.
Configuration on Cloudflare
- Buy the domain. If you don’t have it yet, buy the domain that you like the most. I recommend Google Domains to do it because of its simplicity.
- Import the domain to Cloudflare. I will not dig too much in this step, there is a lot of information on the internet about this and the process will depend on where you bought the domain.
- When you have your domain successfully in Cloudflare, it’s time to configure the DNS to point to the GitHub Pages servers. Next, the following photo is an example of how your configuration should look like:
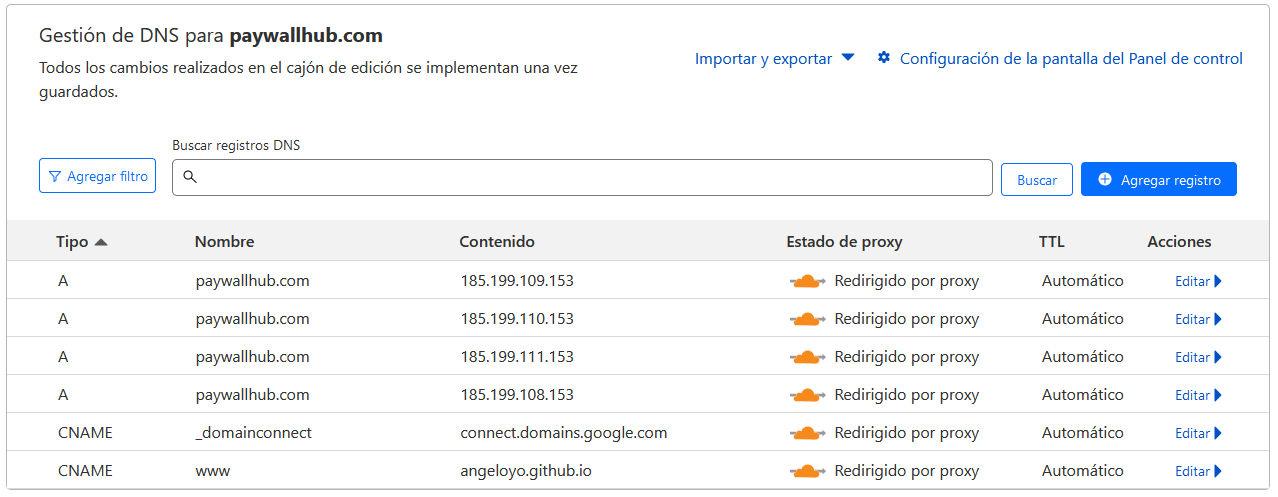
Go to the left panel -> DNS. Then, basically you need to create four A records pointing to four GitHub Pages IP addresses:
  185.199.108.153
185.199.109.153
185.199.110.153
185.199.111.153
All this information is in the official GitHub documentation. It is good that you review it in case there have been any changes since I have written this.
You must also create a www CNAME record that points to your-username.github.io
In theory, everything is ready, however in my case I have found problems with SSL and to solve it I had to change another configuration:
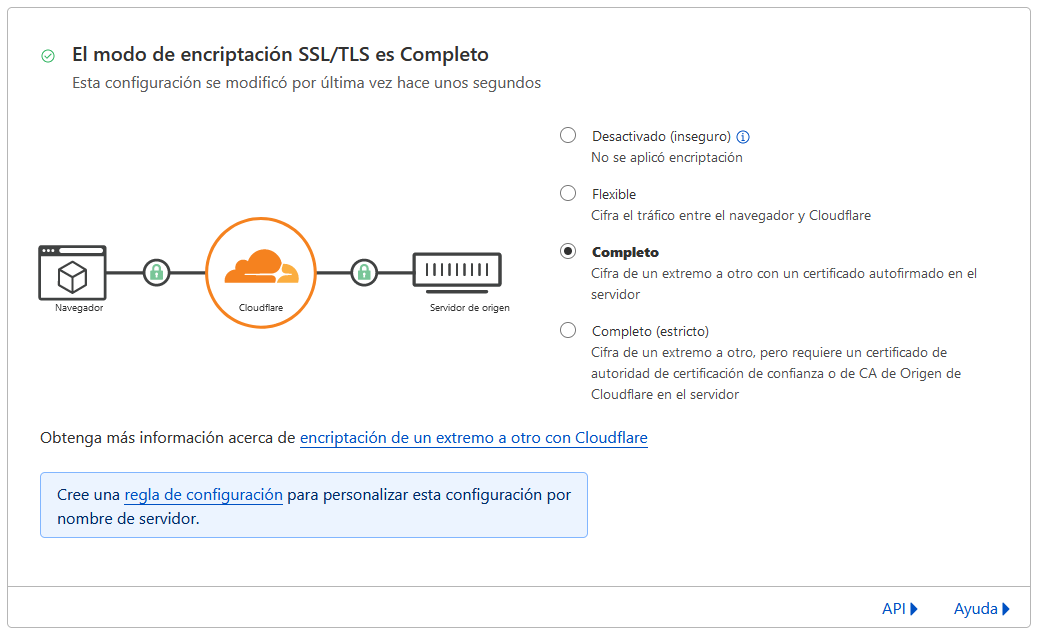
In the left panel of Cloudflare go to SSL/TLS and change the encryption mode from flexible to Full.
Configuration on GitHub
Once our domain is correctly pointing to the GitHub Pages servers, go to your GitHub repository, go to Settings -> Pages -> Custom Domain and type your domain. As you can see, it is very simple. Pressing “Save” will verify that the DNS records are correctly configured.
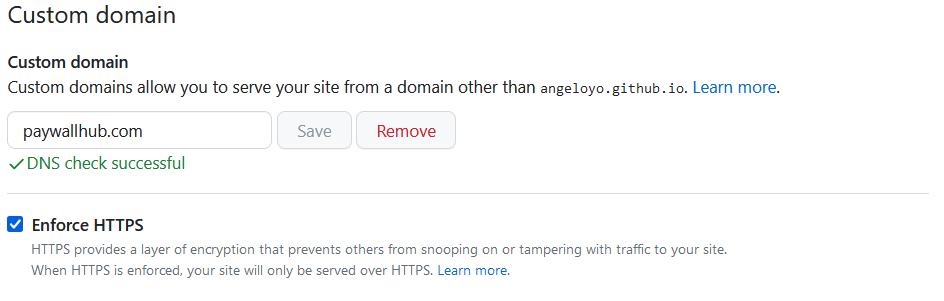
When you see the green tick that says “DNS check successfull”, you’re all set! Go to your domain, and if all went well, you should see your website generated with Hugo and hosted completely free of charge! 😀