Do not trust Oracle Free Tier
A few days ago I found out that Oracle was offering free servers forever, so I decided to give it a try. Everything was going well, in fact, I started to host this website on one of those servers, and I even wrote a post on how to do it step by step.
However, yesterday I received an email that my instance had been deleted. They didn’t give any notice, they just canceled my account suddenly. I tried to contact technical support, but they didn’t tell me anything, only that they were sorry but my account had been cancelled. When I ask what is the reason, they just close the chat.
Searching the internet I have seen that this has happened to many people.
I make this post to say that I do not recommend using Oracle Cloud. Because I don’t want to throw away the work I did writing, I will leave below the deleted post on how I started hosting my static website on Oracle Cloud Always Free-eligible servers. Just in case someone wants to try them, always taking into account that Oracle can (and probably will) delete your instance at any time. It can occur in one week, one month, or one year. Just be sure you don’t have there important data.
1. Oracle Cloud Free Tier
Register here. They will ask you for a valid payment method and will only charge around €1.
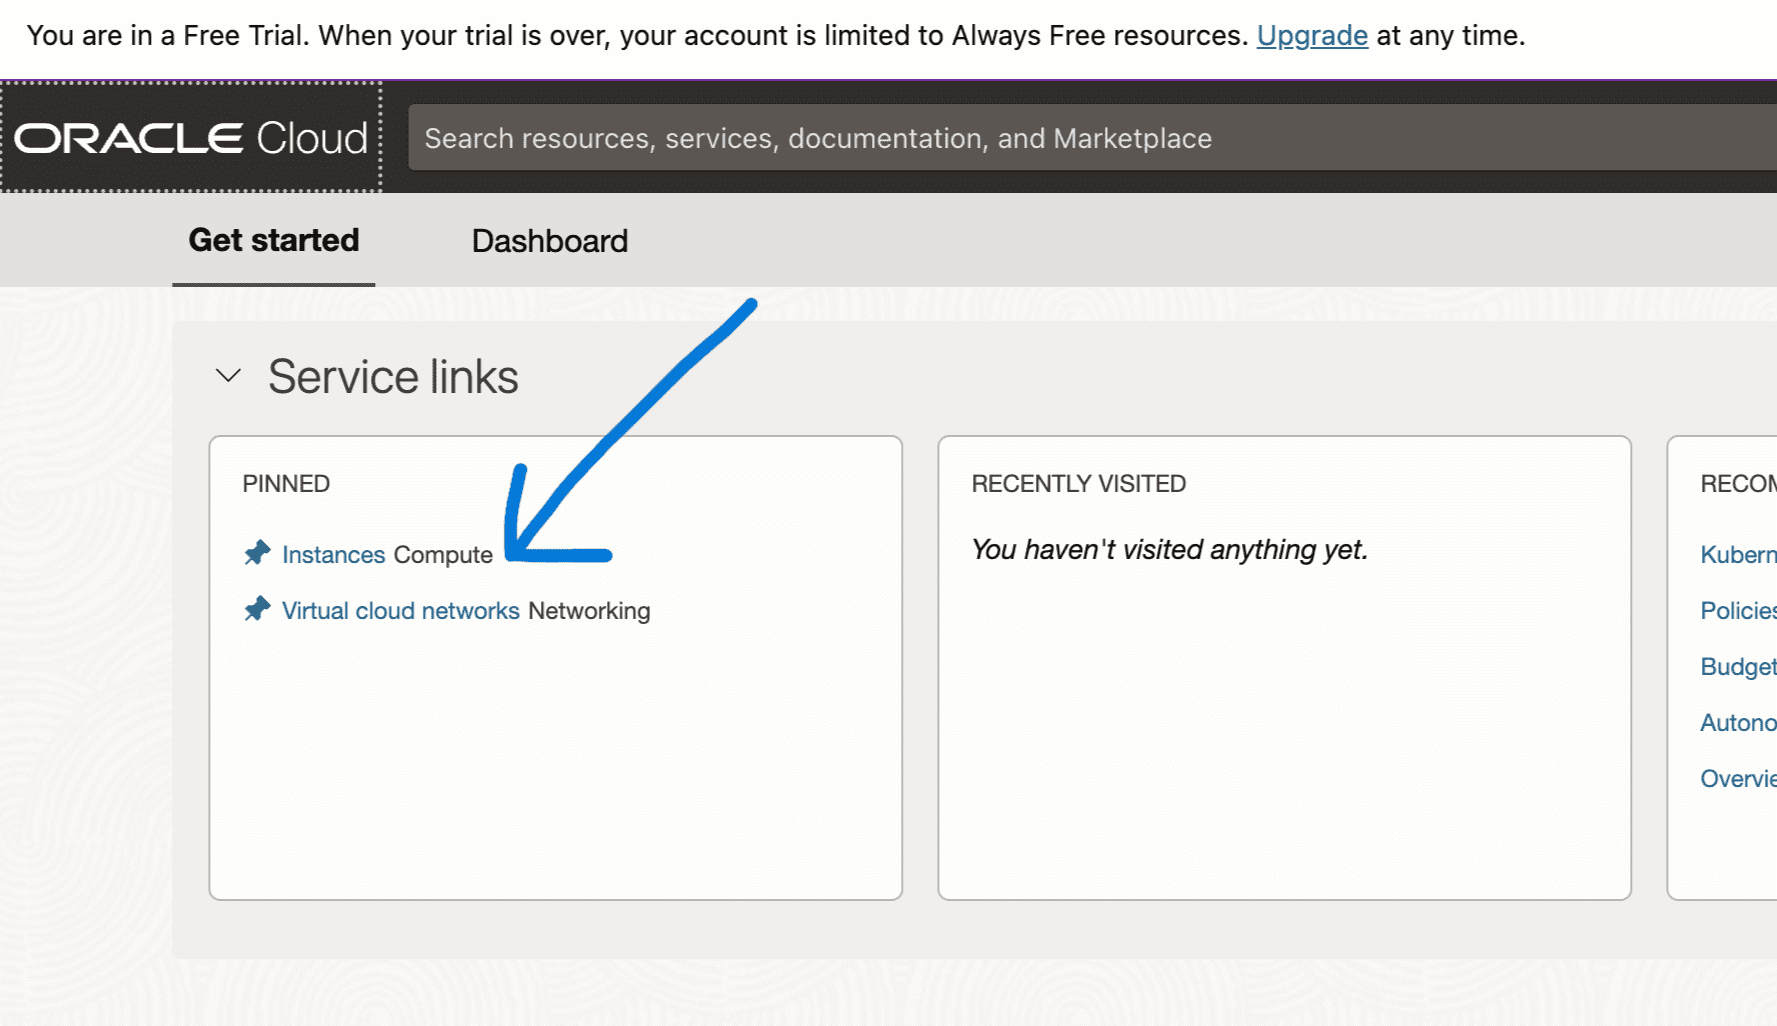
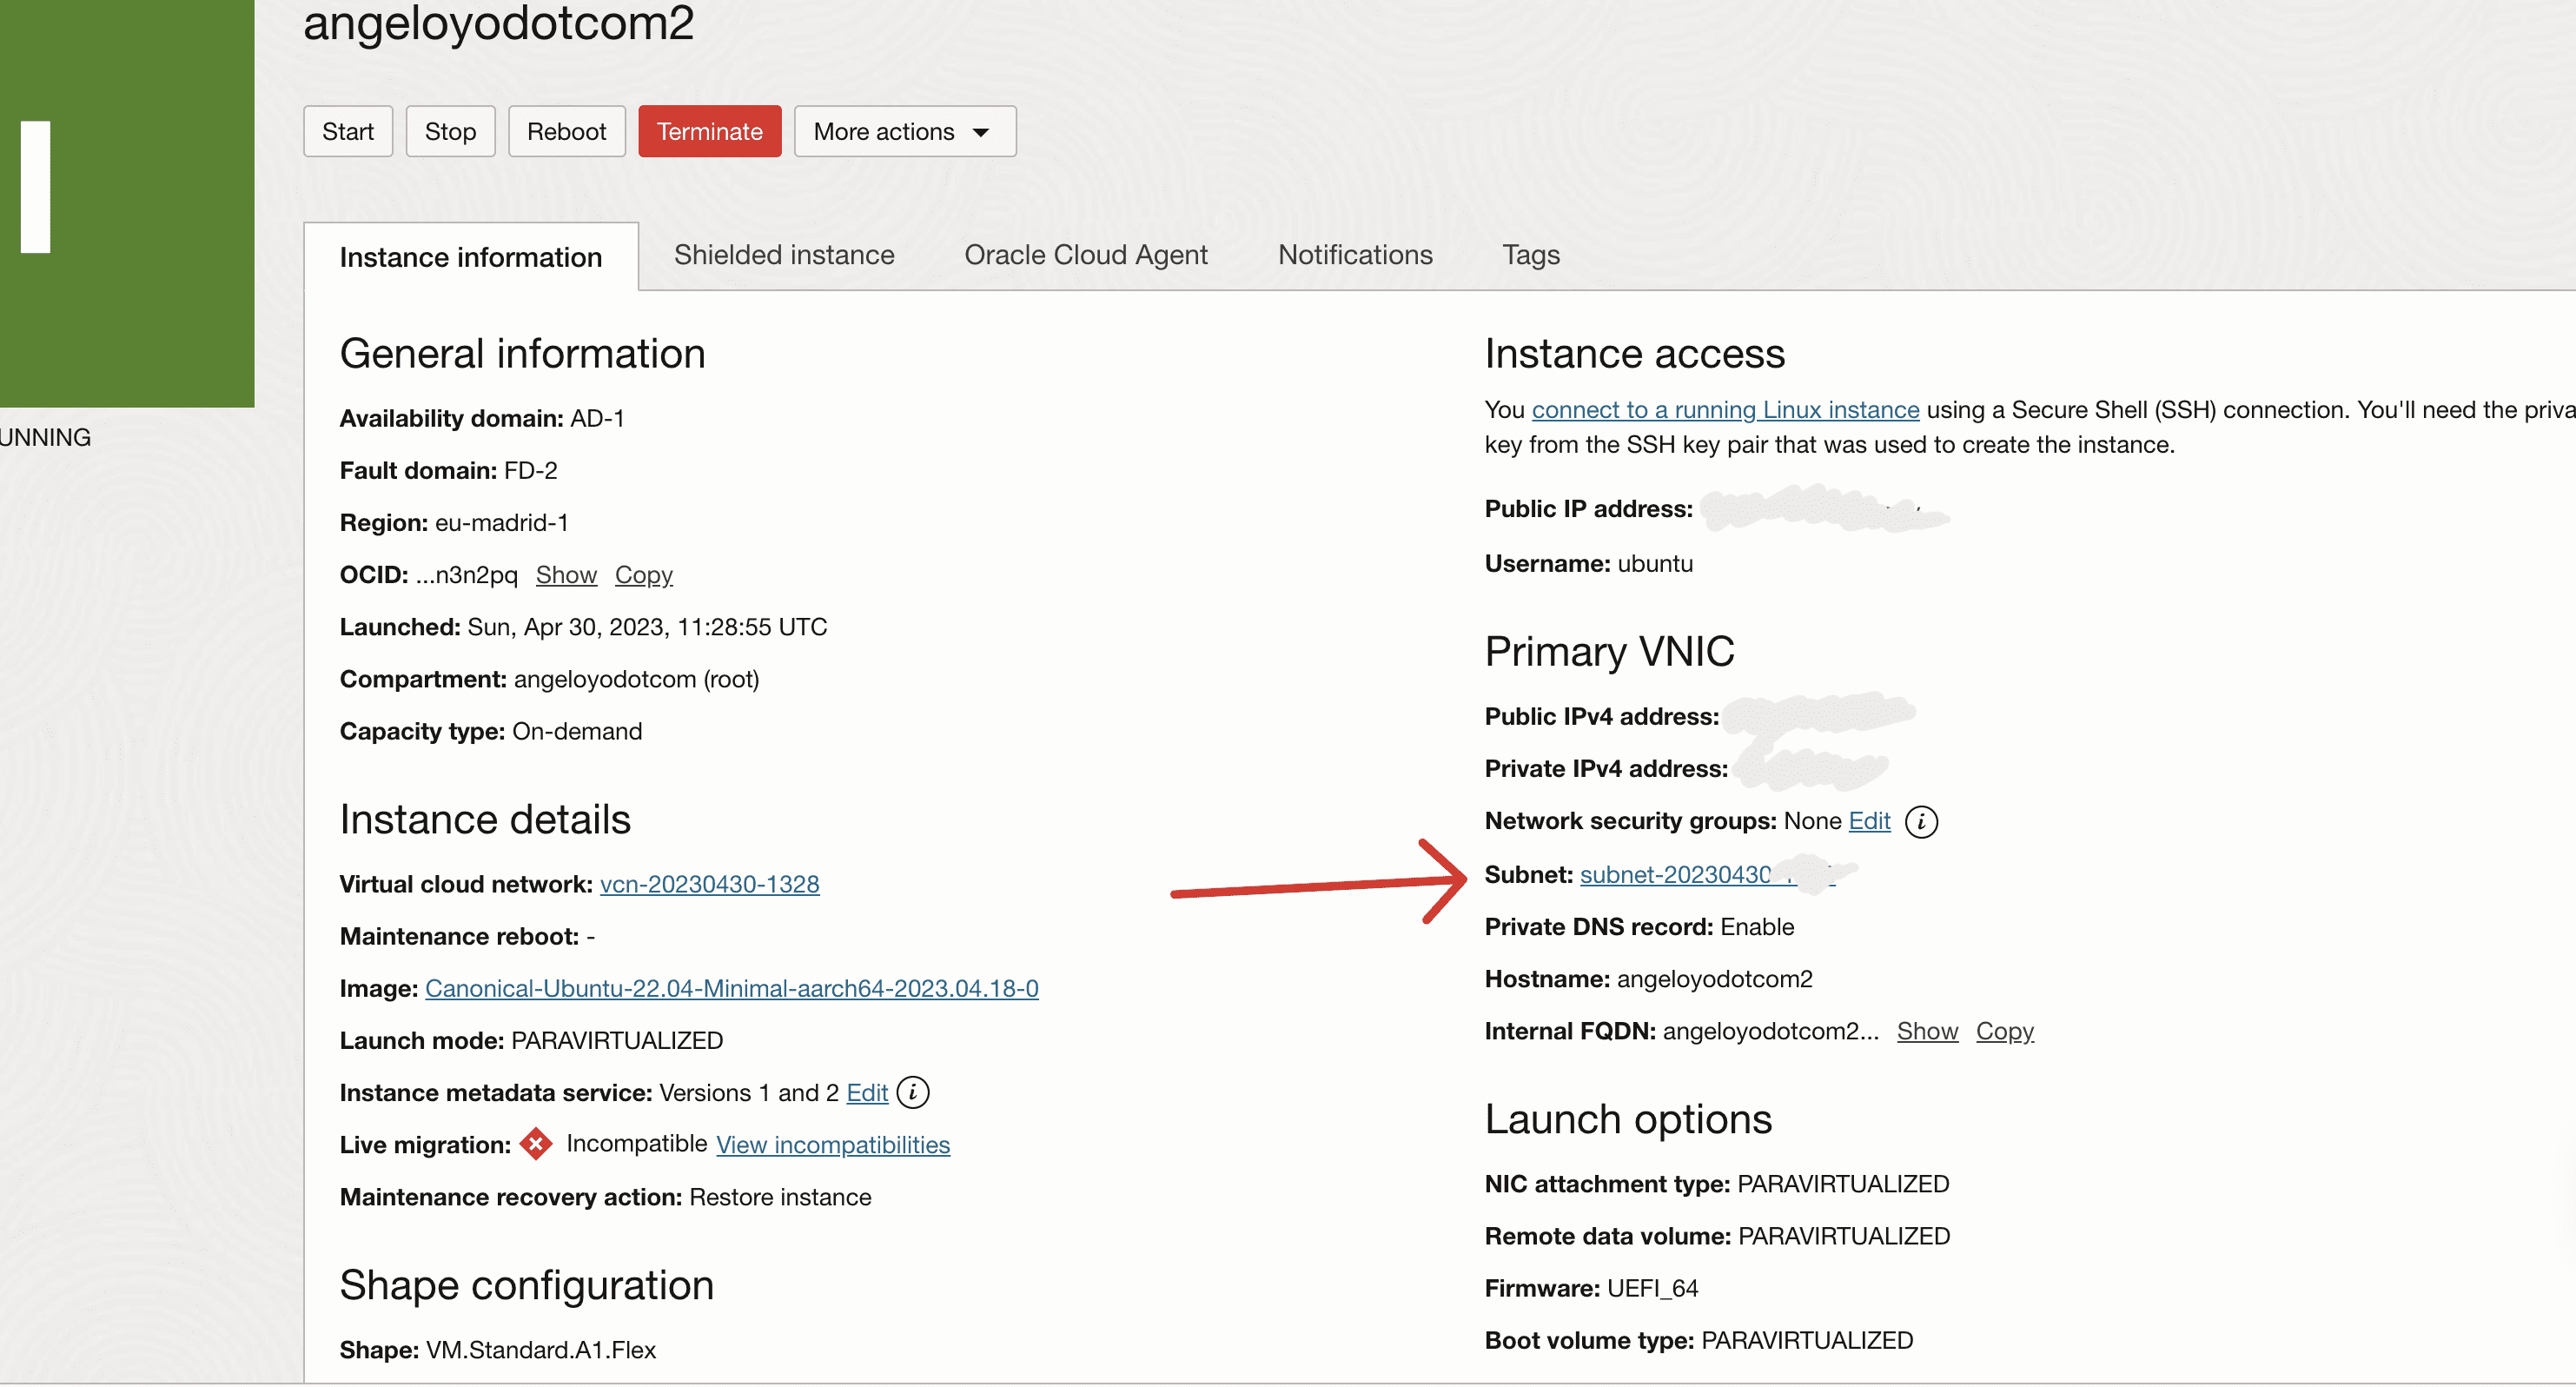
When you have your account, go to instances.
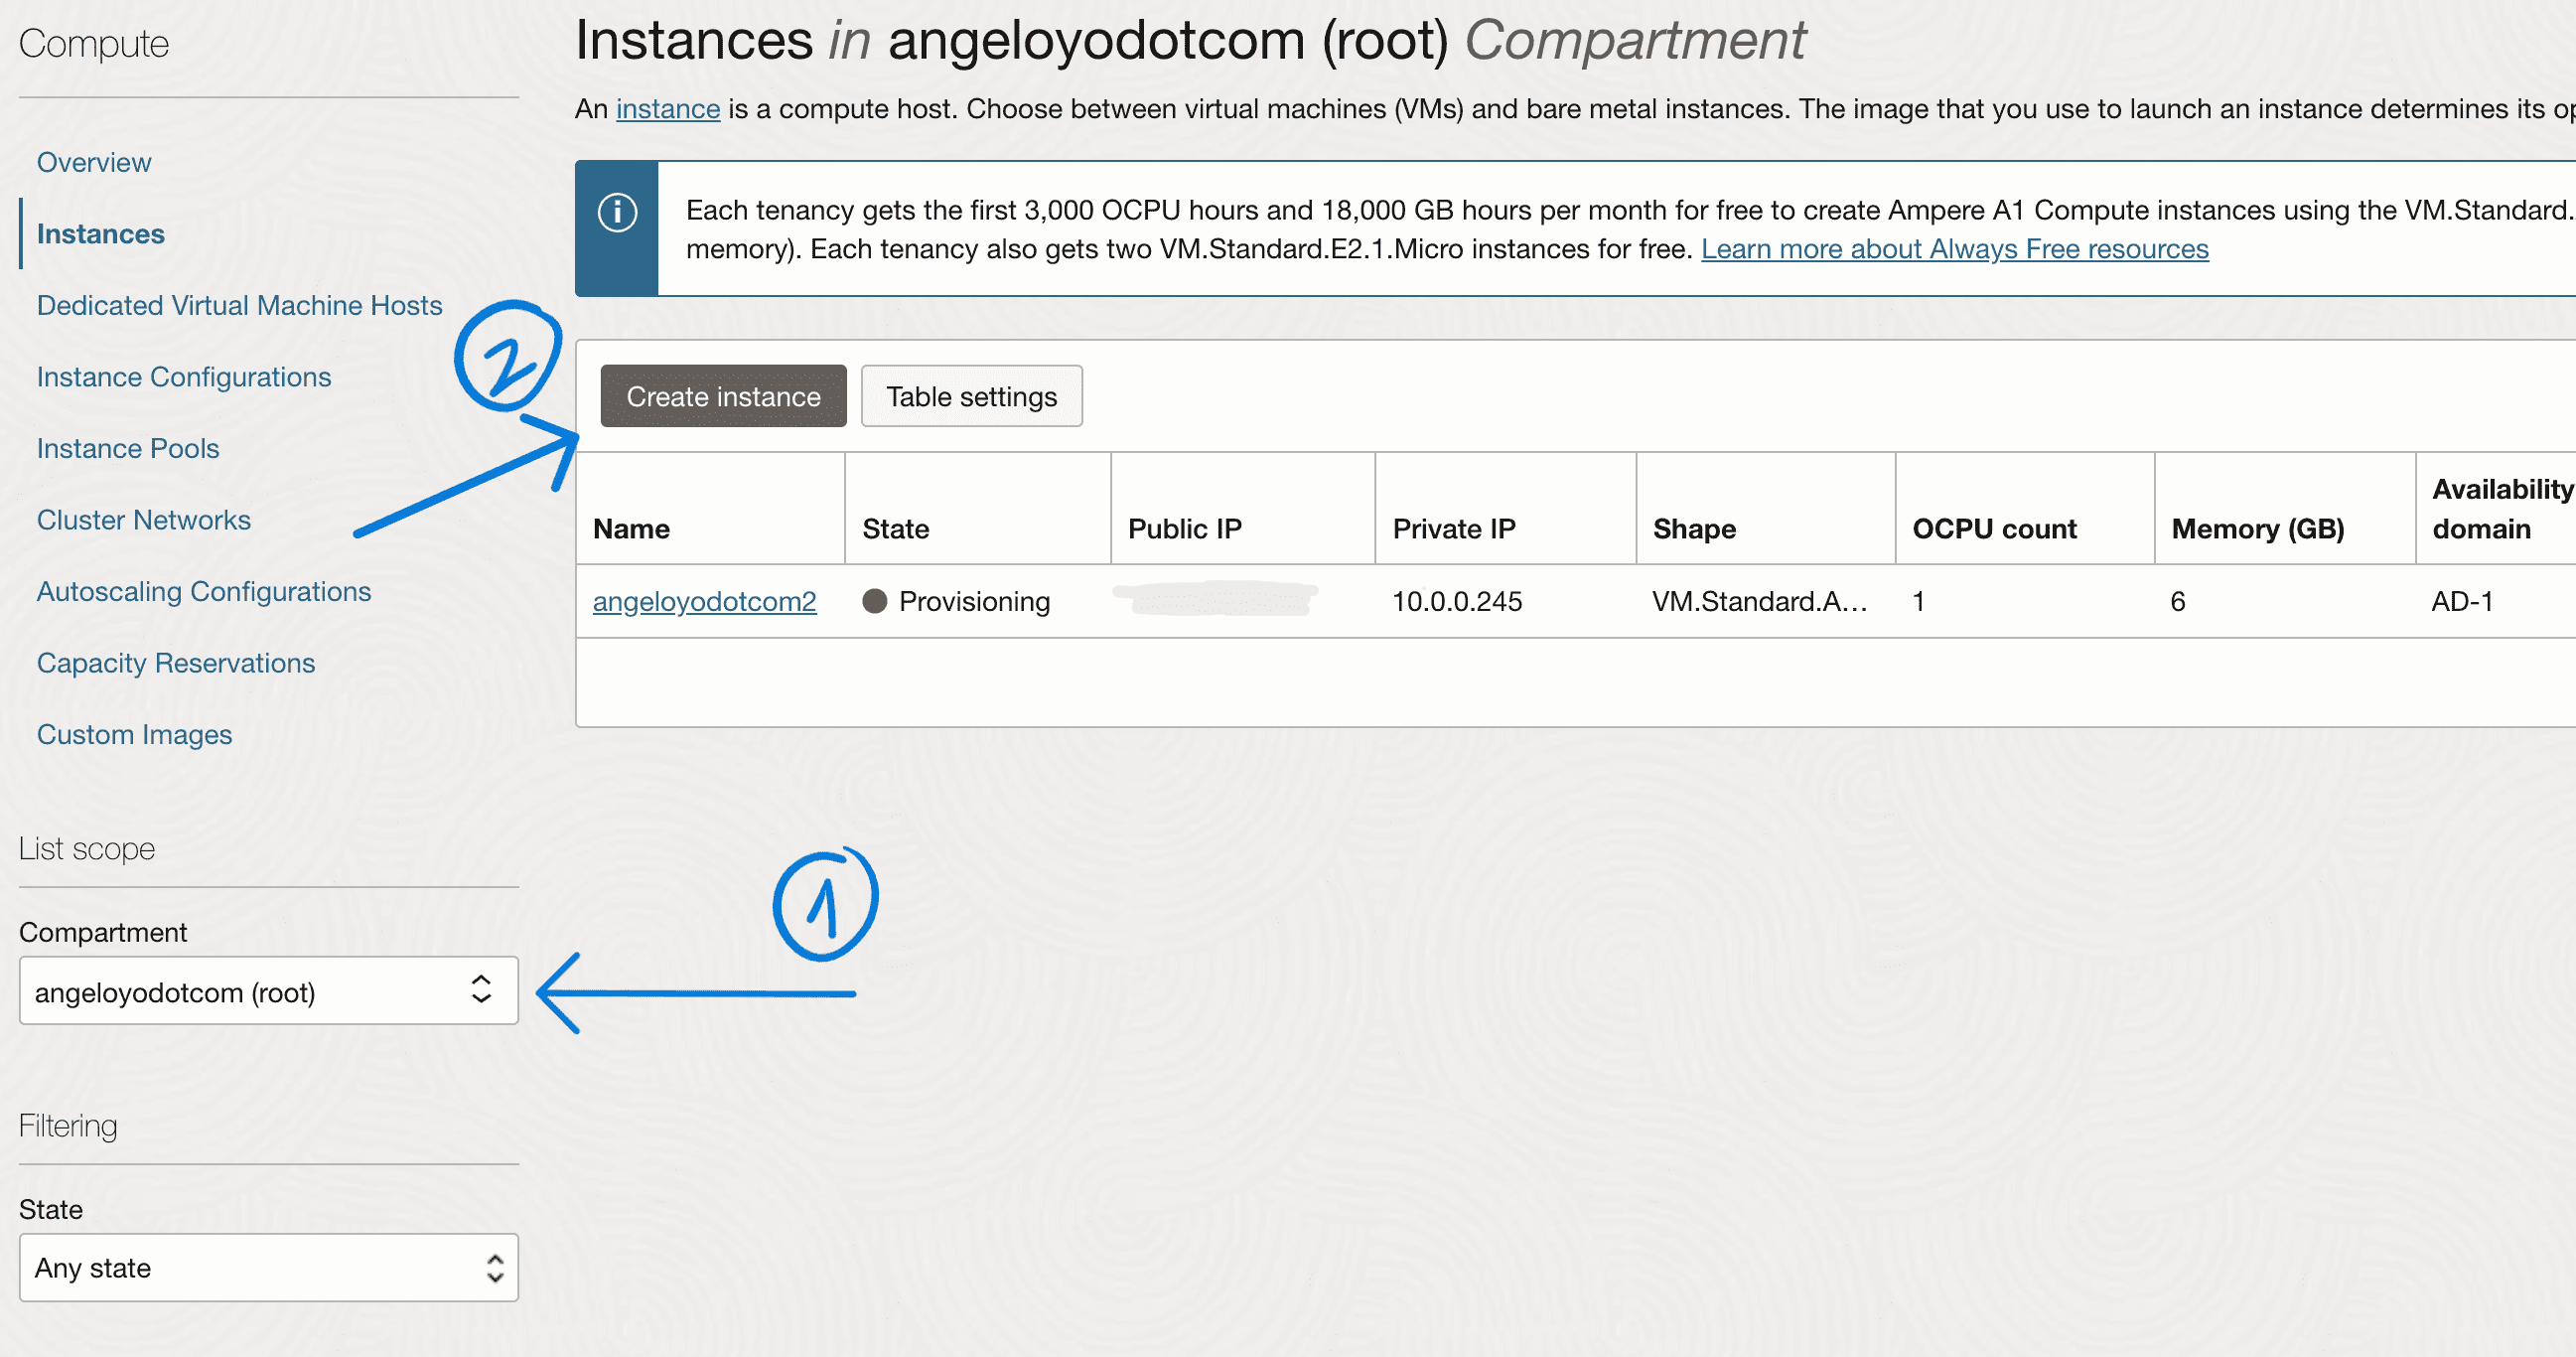
Now, select your compartment, and then click create instance.
Let’s go step by step:
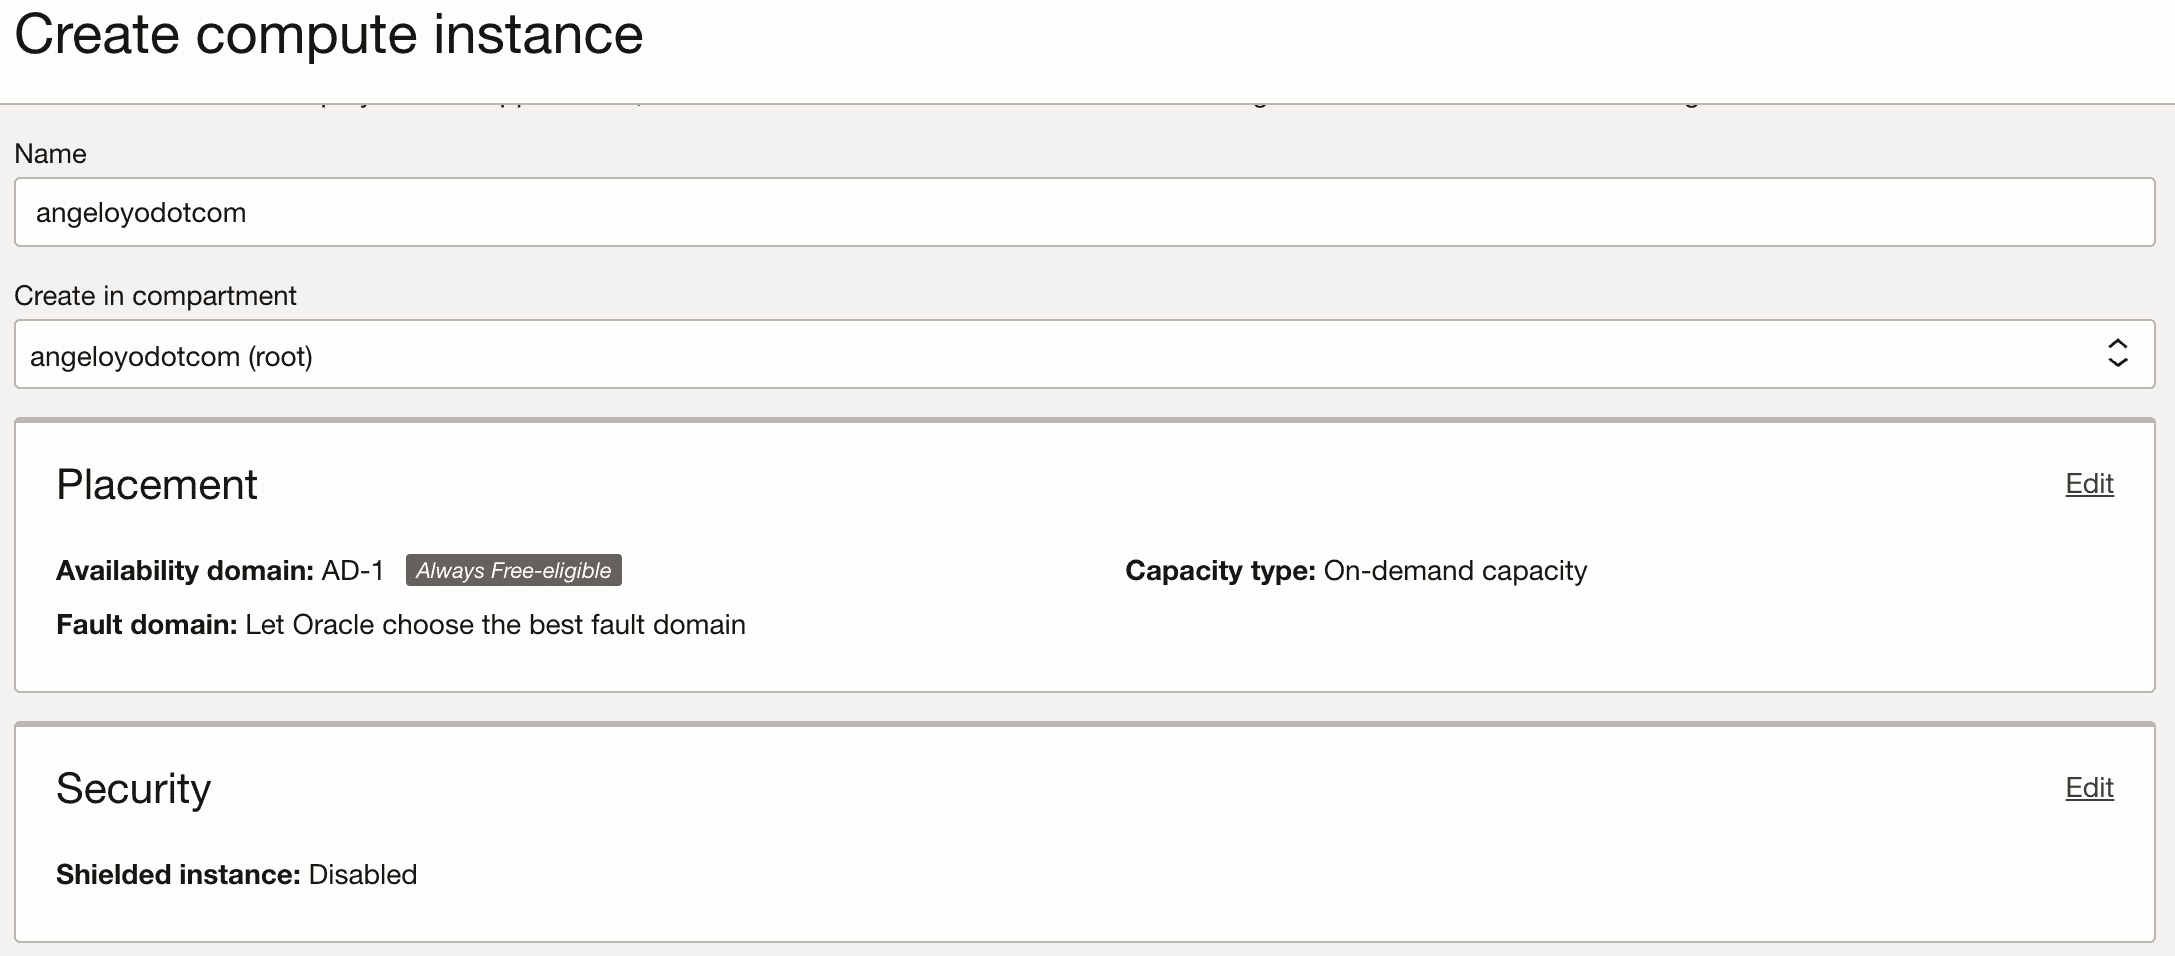
Type the name of your virtual machine, and leave placement and security as is.
In shape, choose what you want, always checking that it is Always Free-eligible.
Right now, with the Ampere ARM series, you can get up to 4 cores and 24 gigabytes of RAM, but for my simple website, one core is enough for me (no need to be selfish).
As for the operating system, I like Ubuntu, but again, you can take whatever is Always Free-eligible. If you have taken ARM processors, your OS must be compatible.

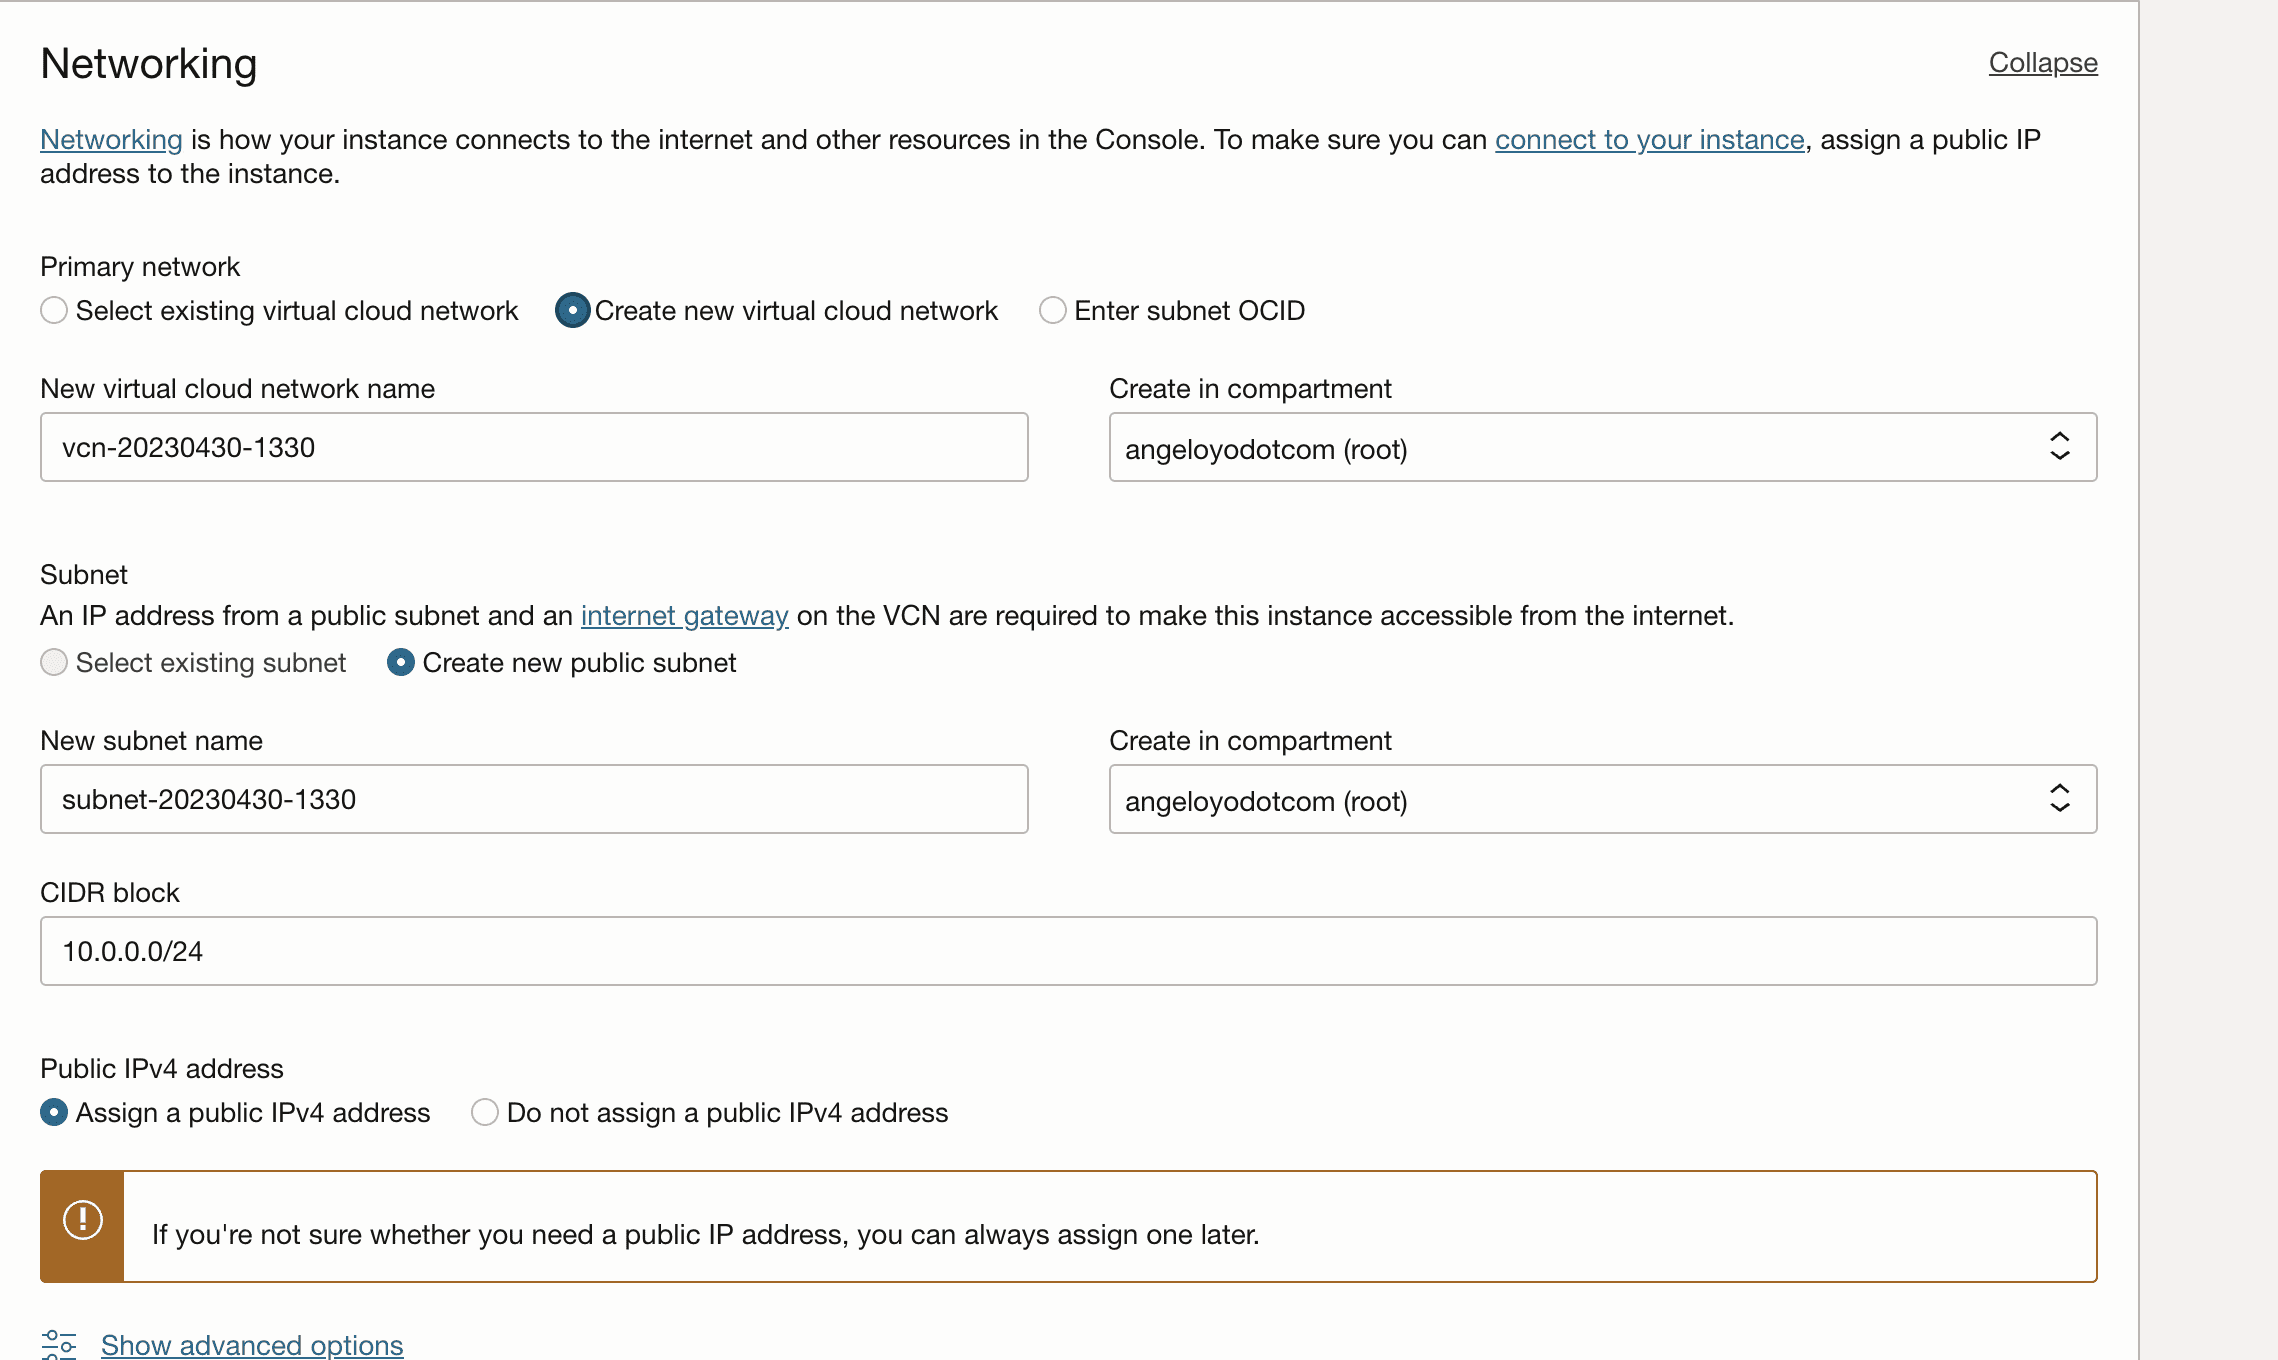
Under Networking, create a new virtual cloud network and a subnet
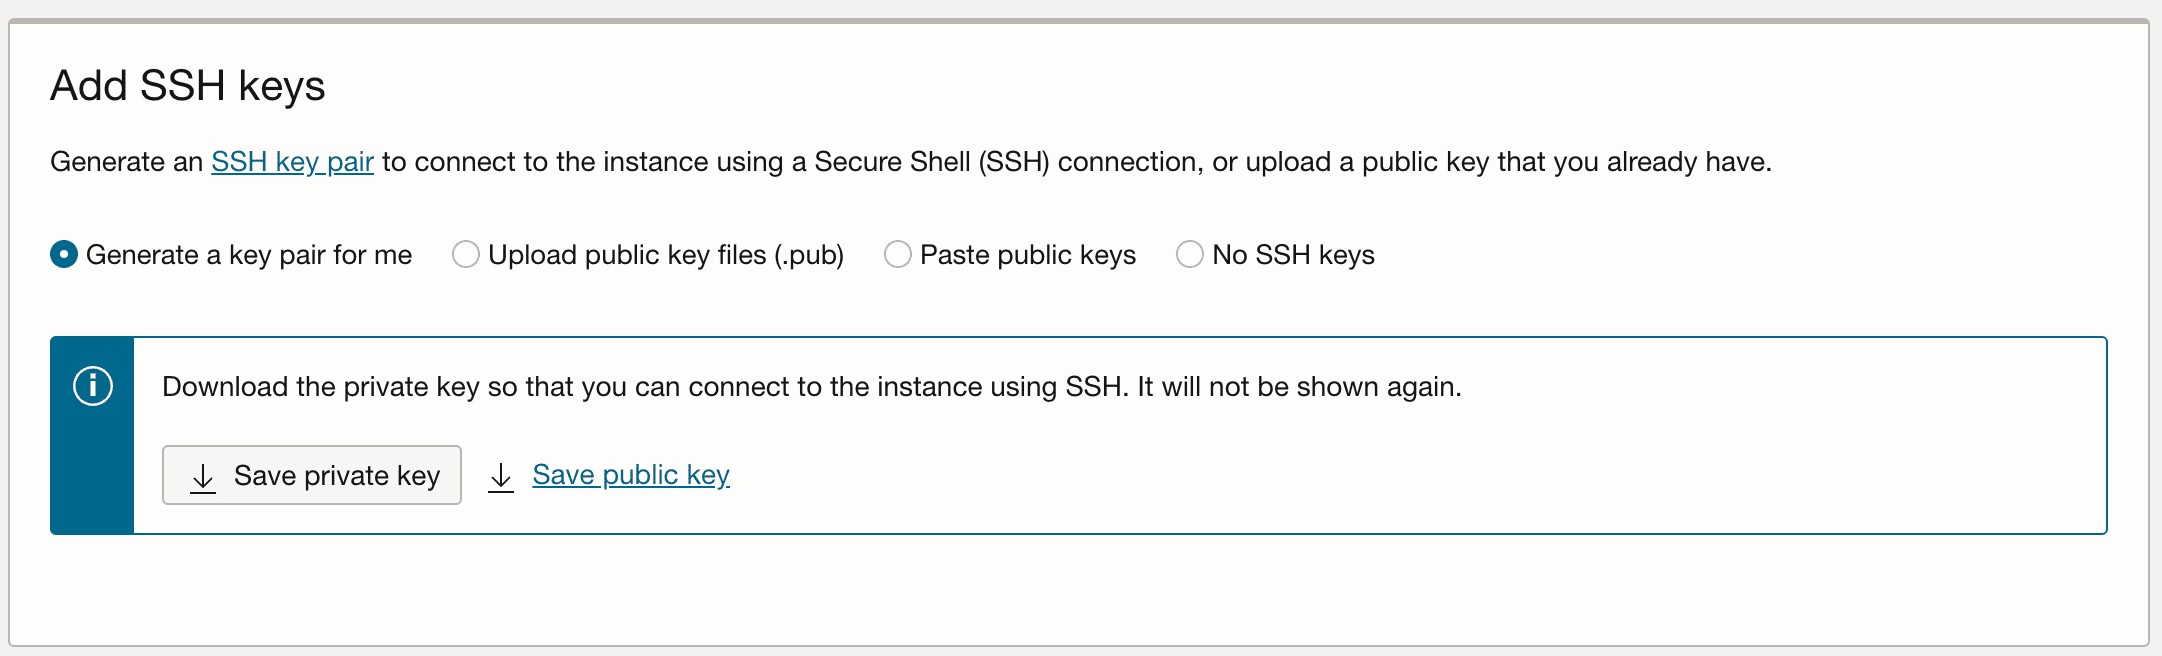
Very important, download your SSH keys to access the server.
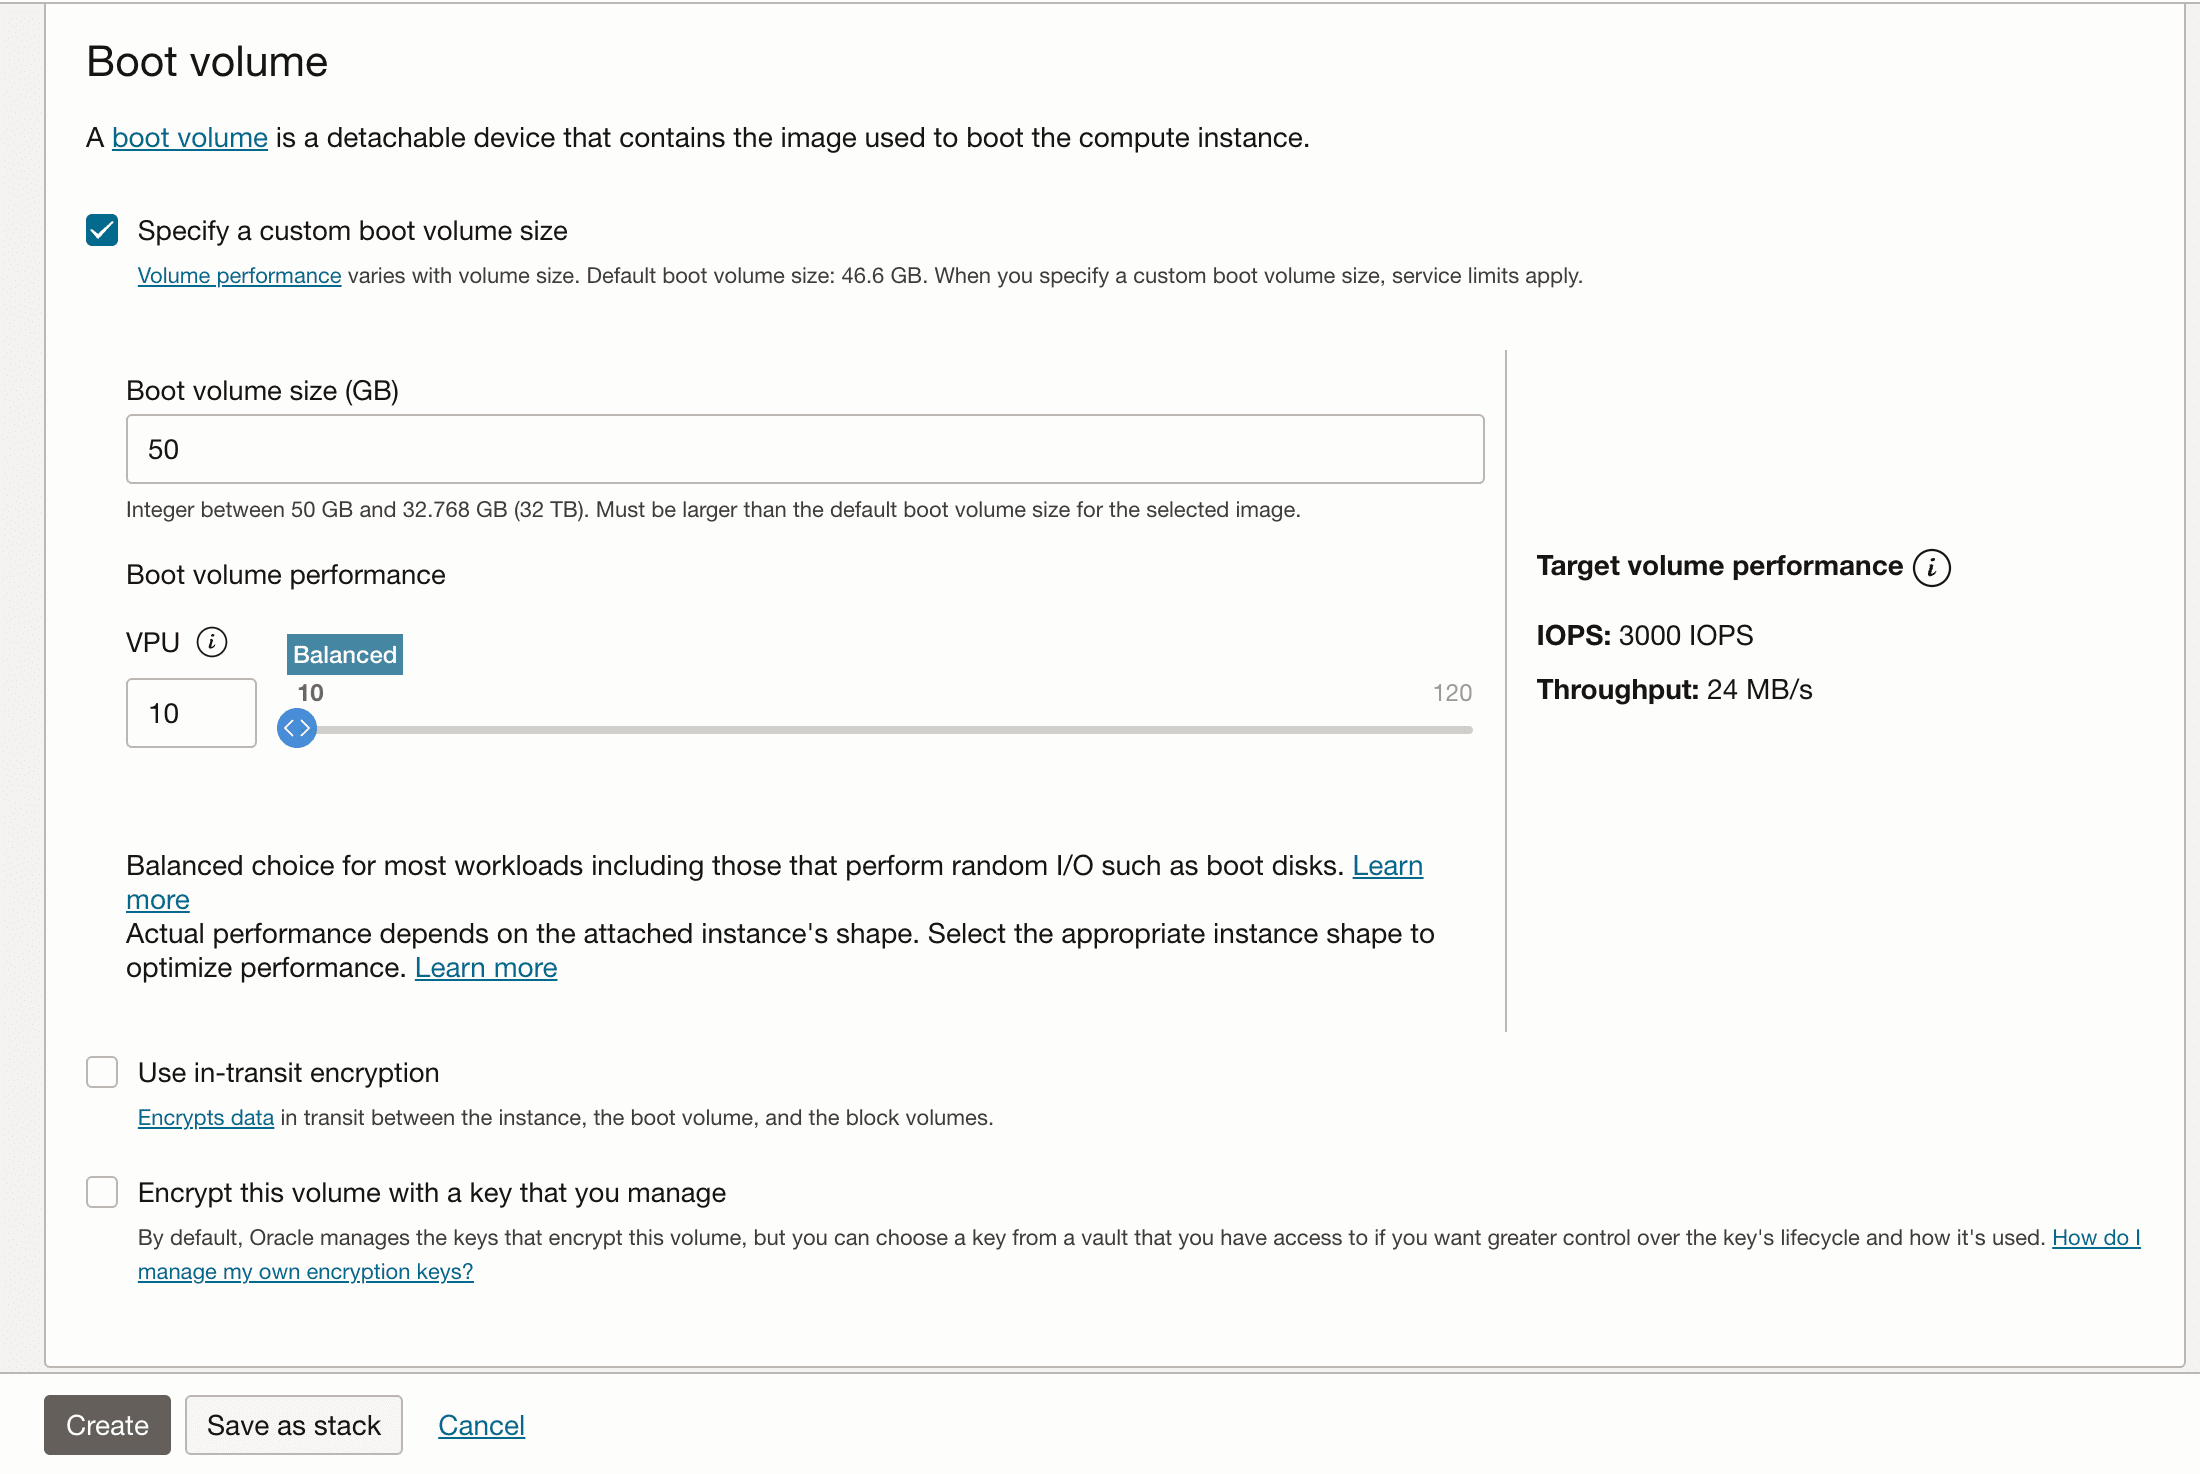
Finally, choose the storage as it suits you. I will leave it by default, be careful because if you go too far it may start to subtract your balance, and when a month passes they can charge you.
All that remains is to hit the create button! It is possible that it gives you an error because they are full of capacity, if it happens to you, you can only wait for a slot to be released.
2. Accessing the server
In my case I will access the server from windows with Putty.
First, you have to convert the private key that we have downloaded so that it is compatible. To do this, once Putty is installed, we open Puttygen and carry out the steps in the following image: (Select the private key, the public one is not useful to us)
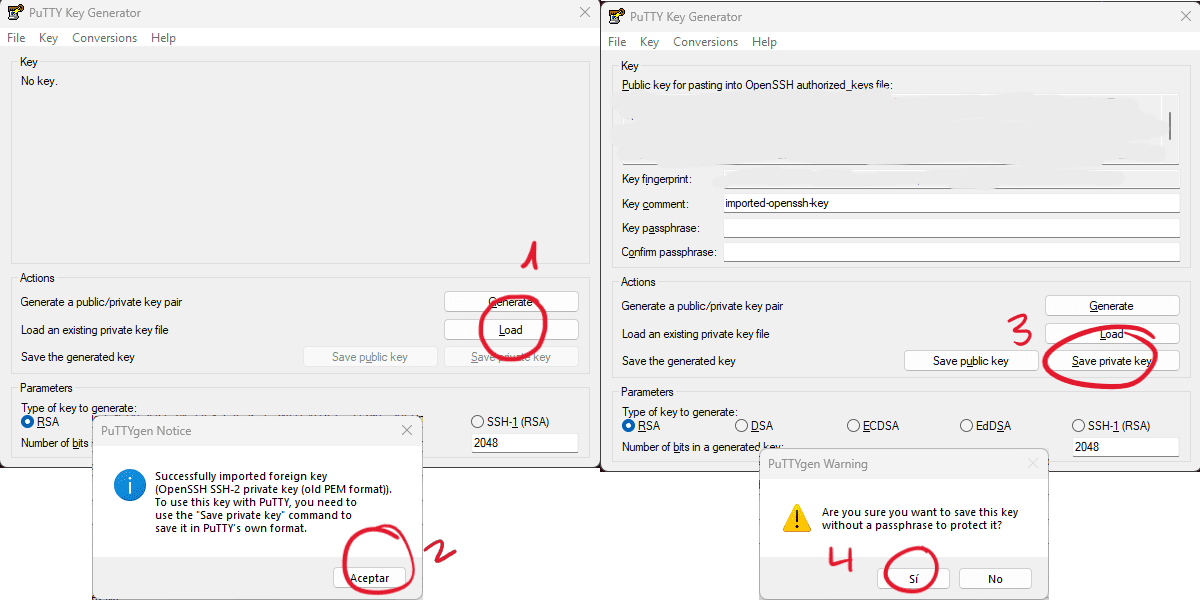
We put the name we want and save.
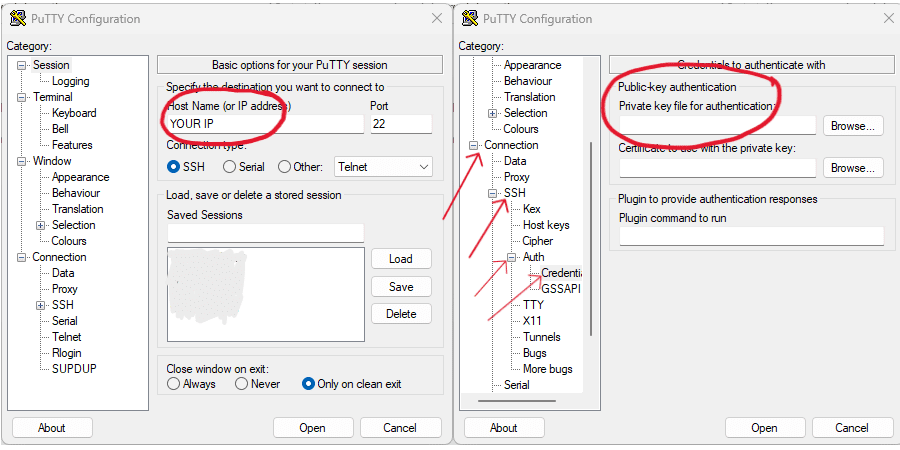
Once we have our new private key, we can open Putty. We introduce the ip of the server, and we choose the file in Connection -> SSH -> Auth -> Credentials.
We can connect now! If you have chosen an ubuntu operating system, the username will be ubuntu. Once inside, the first thing I recommend is to update the server. Run sudo apt update && sudo apt upgrade -y && sudo reboot. This will update all the packages and then restart the server.
Wait a minute and log in again. Now, you have to install the web server. In my case, I use apache2. Here is a more in depth oracle guide on how to do it. Basically, to install it run sudo apt install apache2.
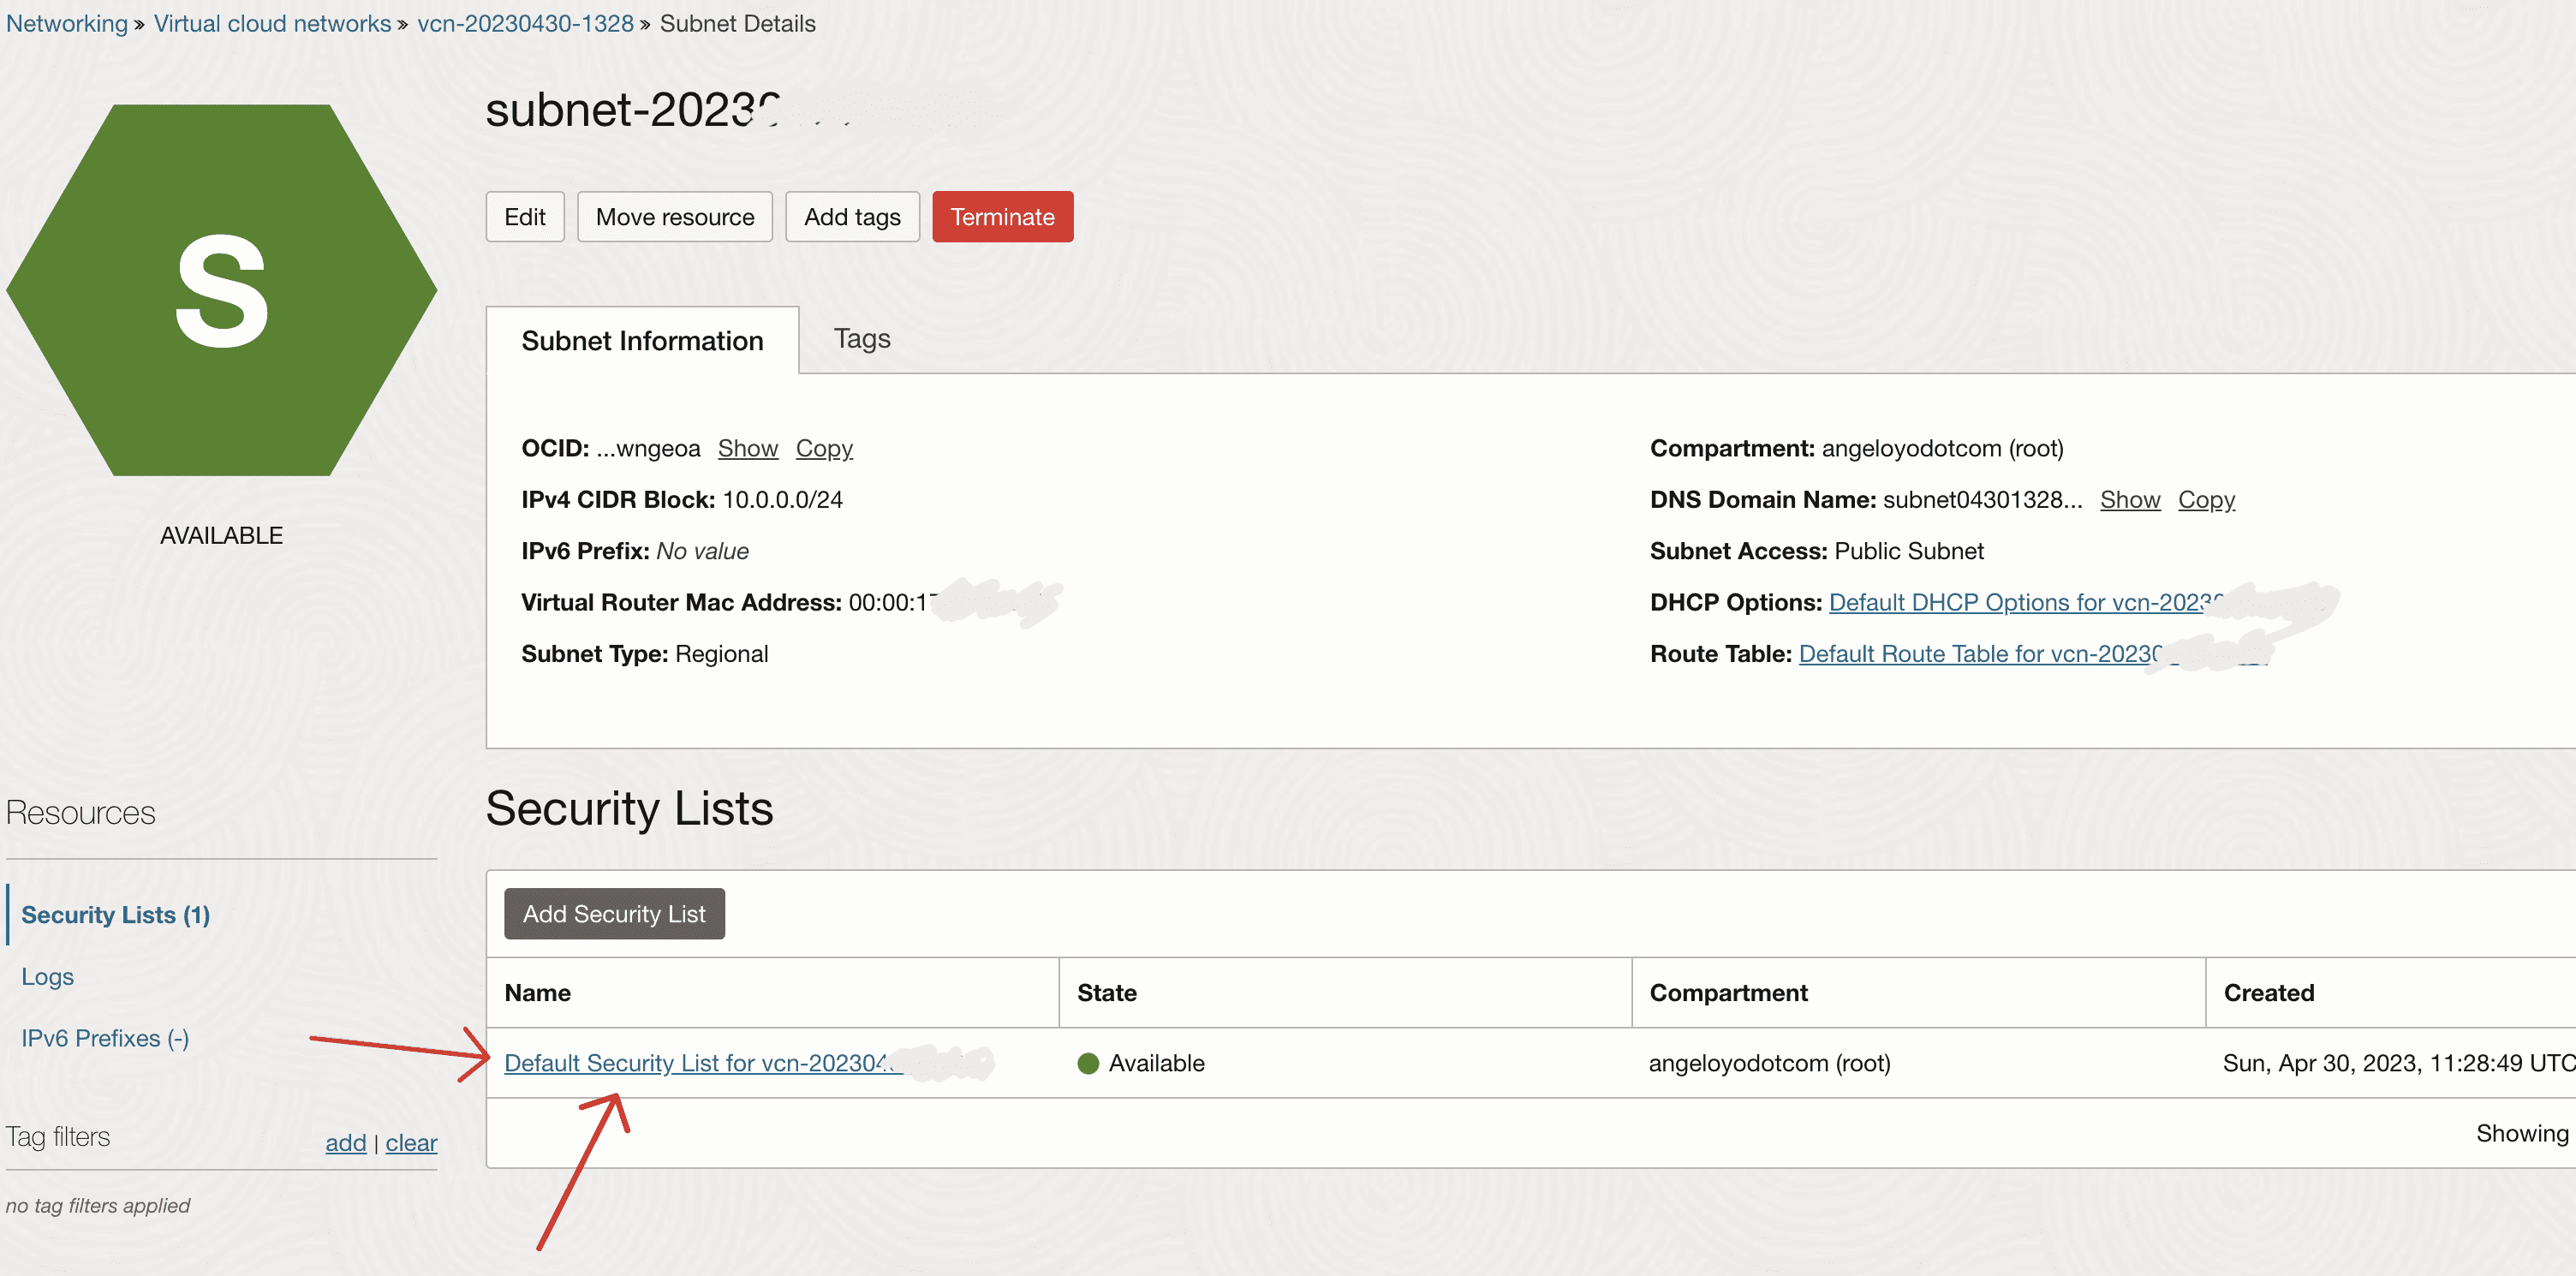
Now with our web server installed, you have to open the port 80 (http). To do this run sudo iptables -I INPUT 6 -m state --state NEW -p tcp --dport 80 -j ACCEPT and then sudo netfilter-persistent save. Then from the Oracle Cloud dashboard, go to your instance. Then click on your subnet.
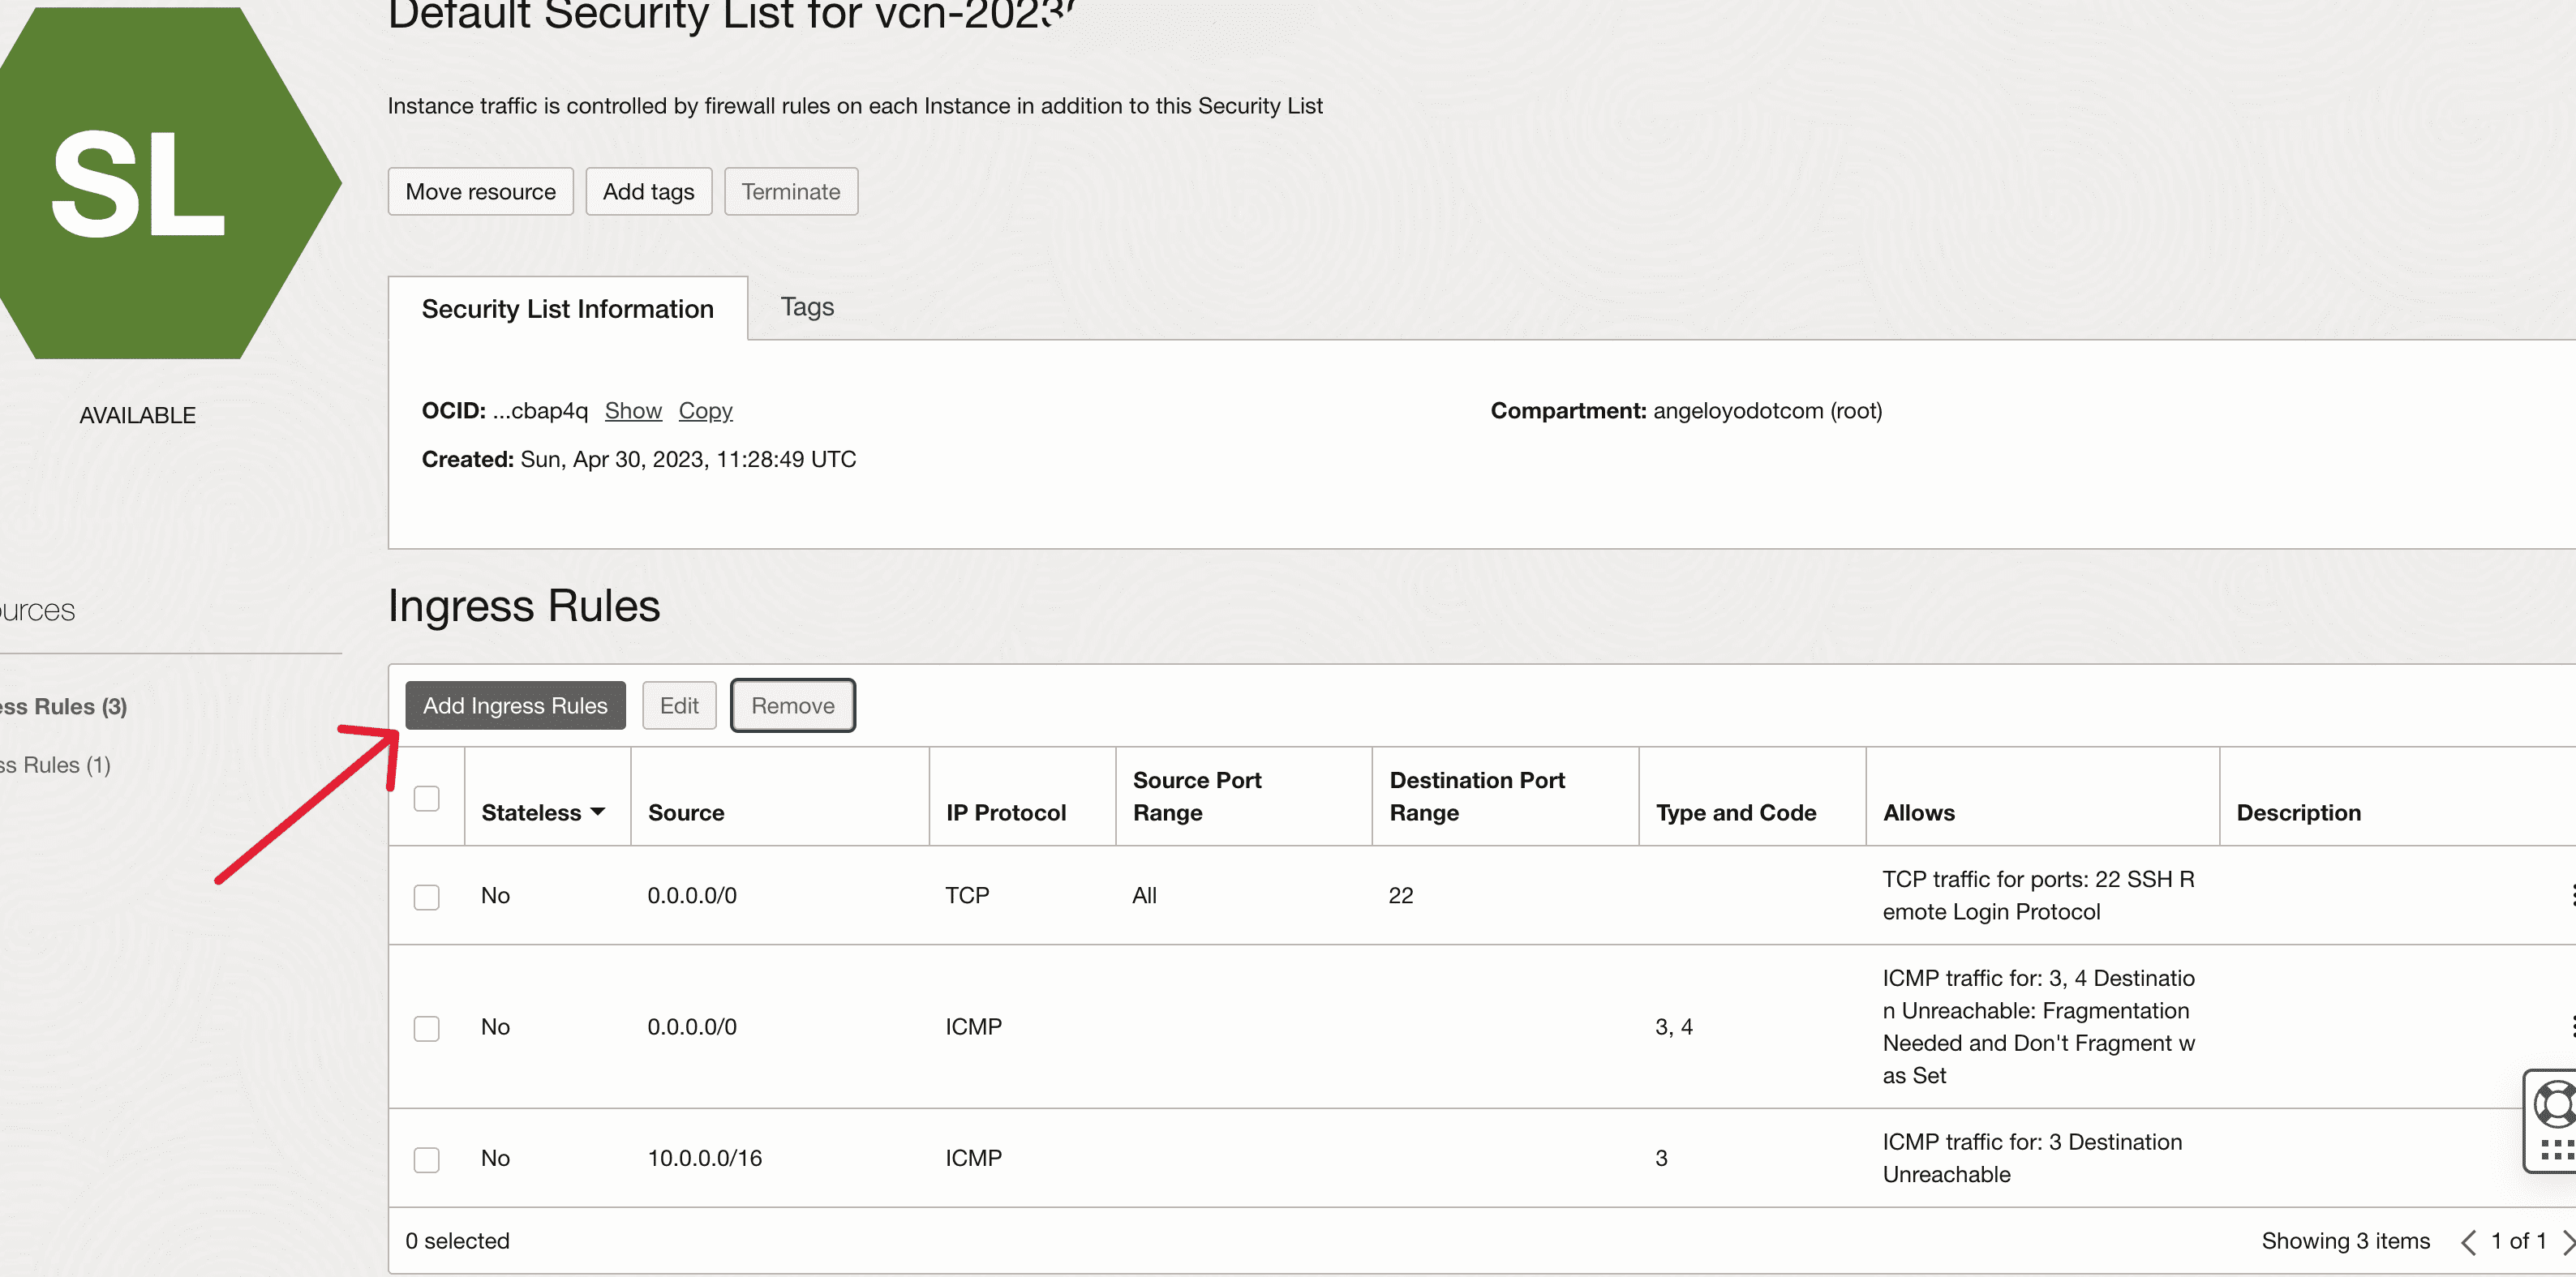
Now go to Default Security List.
Add Ingress Rules.
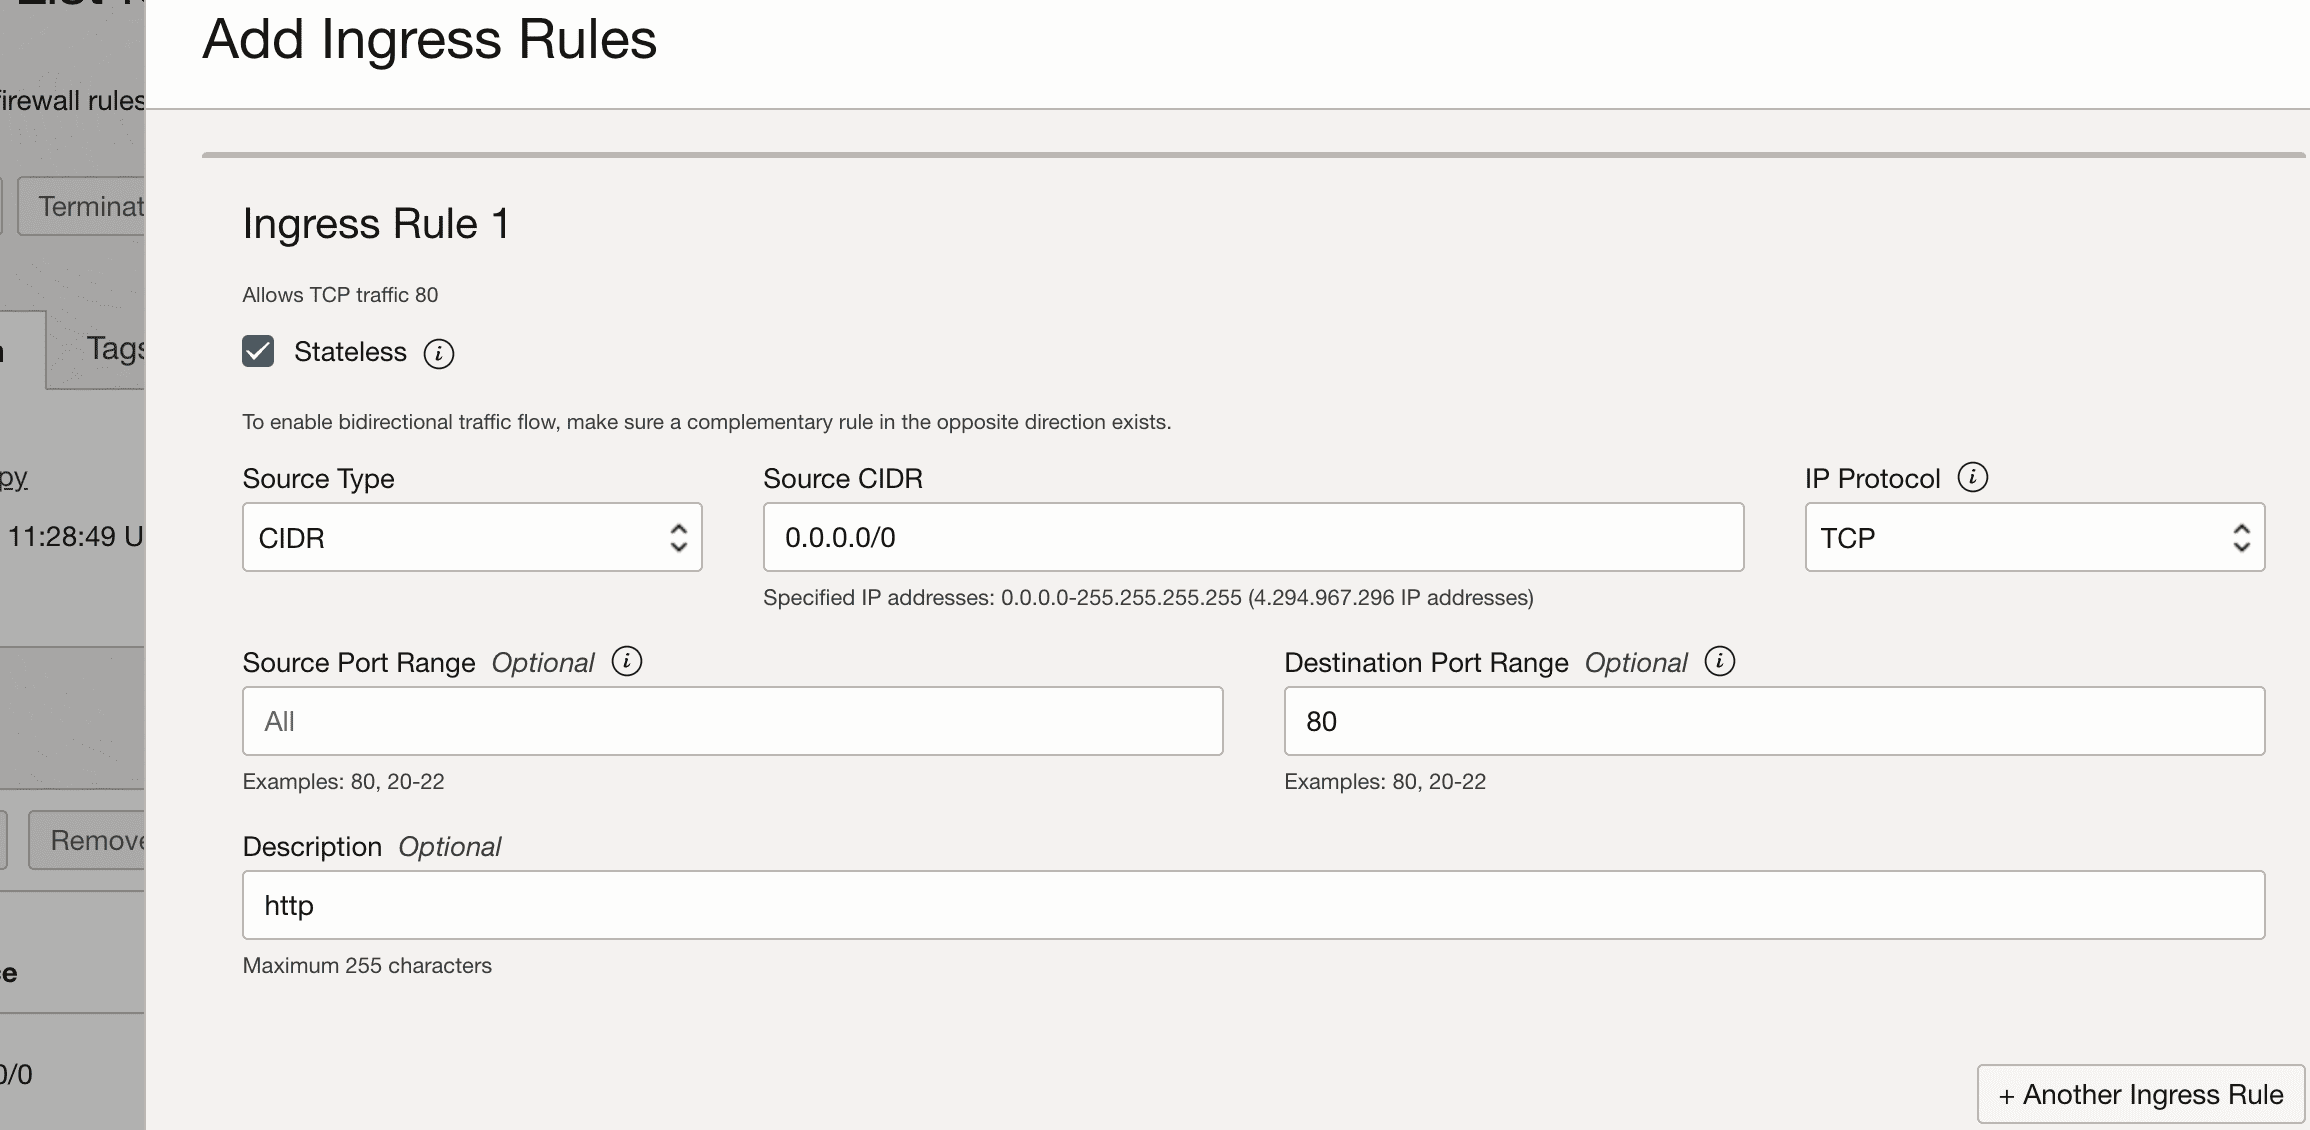
Fill it as in the following image:
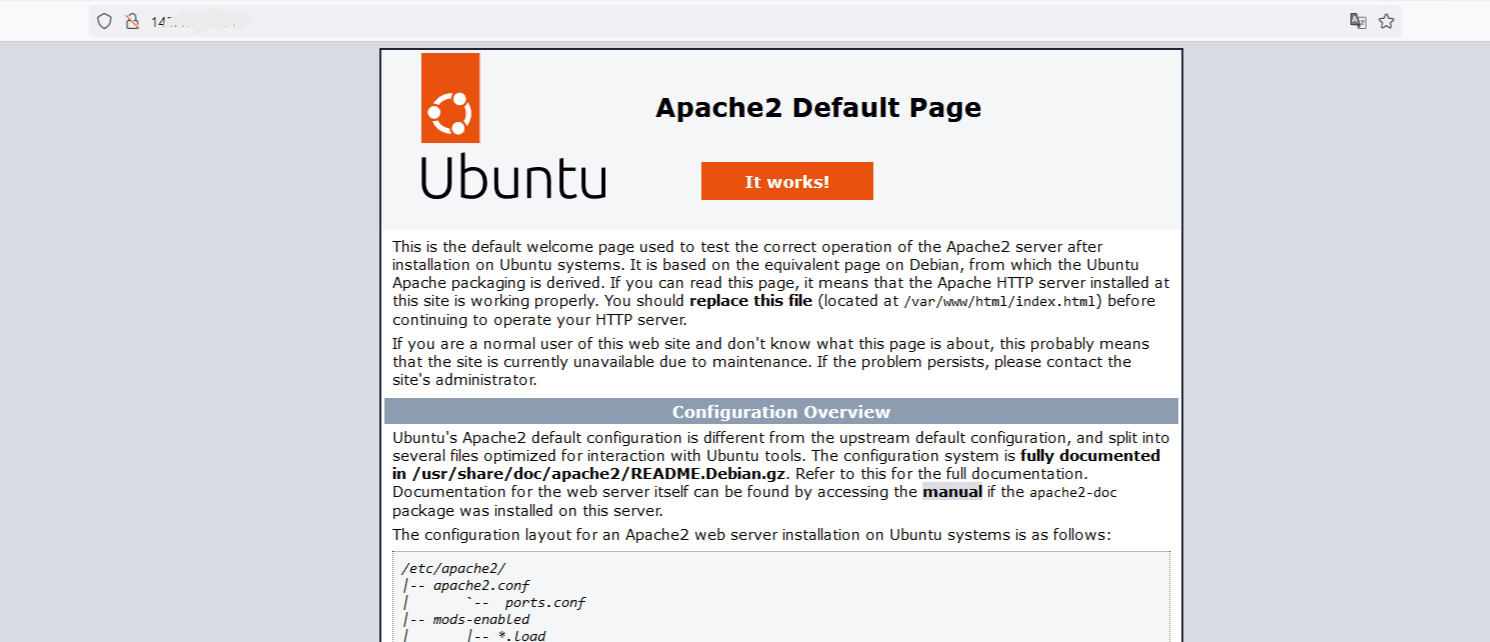
Ready, if everything goes well, you already have apache installed and http port opened. If you type in a browser http://123.123.123.123 (your virtual machine’s public ip) you should see the following:
3. Domain
Not only have I canceled my hosting contract, but also the domain. The one I had before was too long, and the current one I bought it from Google Domains.
4.Cloudflare
Once with my new domain, I have added it to my cloudflare account. They deal with SSL, enforcing HTTPS, among many other things.
To do this you must register and then change the DNS servers of your domain to those of cloudflare. Depending on where you have bought the domain, it will be done in one way or another. As this is a process that depends a lot on your provider, I recommend you look for detailed information about your case.
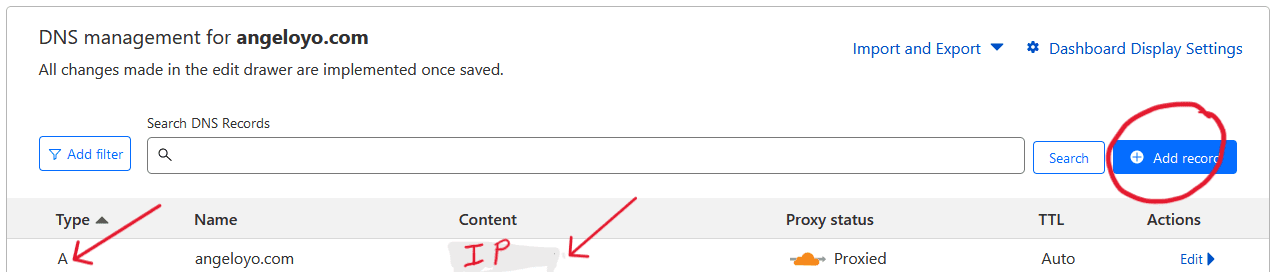
When you have your domain in cloudflare, now it’s time to redirect the domain traffic to the server. To do this, go to the DNS -> Records section. Add a type A DNS record pointing to your machine’s IP address.
If everything went well, you’re all set! Virtual machine, web server, domain, SSL, DNS… 😀 All that remains is to send the files of your page to the server, for example with SFTP, with git…
See you soon!