The odyssey of installing a security camera
I live in an single-family house (chalet), and taking advantage of my recent purchase of a NAS and its ability to use it as a NVR, I came up with the idea of installing a security camera.
Completely determined, I started researching and discovered many types of surveillance cameras: indoor, outdoor, WiFi, PoE, ONVIF, RSTP, with solar panels, SD cards, cloud storage… After a brief discussion with myself about which would be the one that suits me best, I decided to look for a cheap camera with ONVIF protocol, which is precisely the one that allows the usage of the camera from any NVR or NAS.
Searching the internet I found a brand that was perhaps not too known and probably not the best, but it offered a standard camera with the specs I was looking for at a good price (Annke C500, 40€) so I jumped into the pool buying it. Thus begins the odyssey of installing a surveillance camera for the exterior of my house.
1. Connections
The camera was going to be placed (outside) on the wall of the dressing room, on the second floor, and the switch and the Synology were just in the opposite room. My first idea was to buy a long ethernet cable (15 or 20 meters) and go through walls with it. Unfortunately my family and I had to rule out this option since we could not find a way to pass the cable without it being seen in the corridor. If it’s not with wires and the camera doesn’t have WiFi built in, how would I connect it to the NAS?
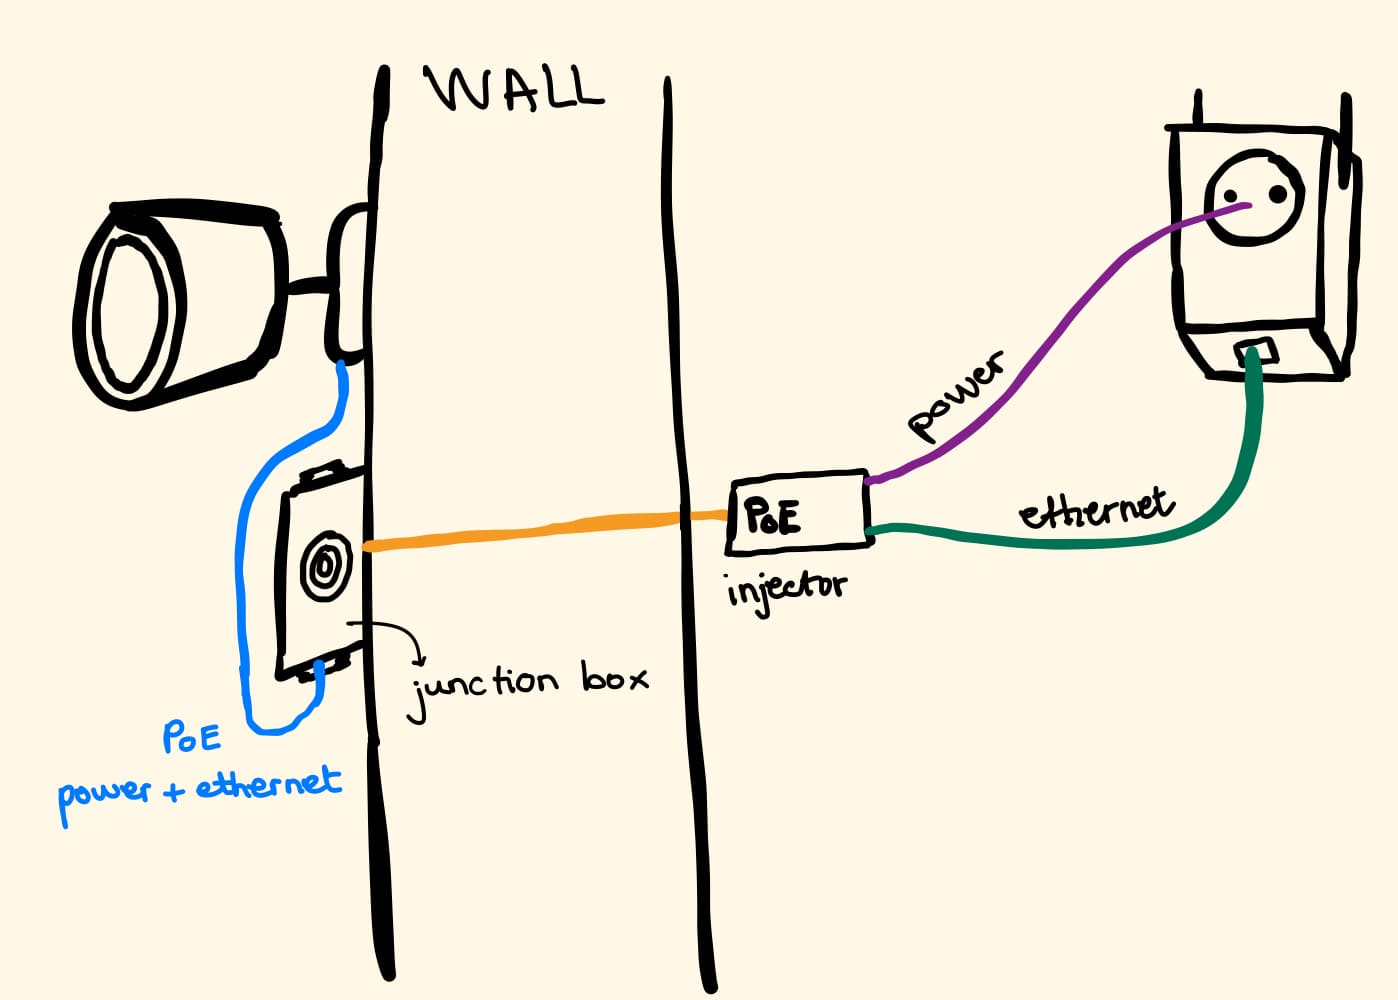
Then I remembered that I had an unused WiFi entender at home (TP-LINK TL_WA860RE) that could help me. Since it has an ethernet port, I was able to connect it to the camera and thus “turn it” into a WiFi capable one. Along with this I bought a PoE injector in order to just have one cable coming out from the wall, with electricity and data, as in the following drawing:
2. Instalation
After having all the necessary components and everything thought out, it was time for the actual instalation, which became complicated due to my little experience in this area. The first thing I had to look for was a suitable drill bill to go through my wall, and I ended up using one that my father had in the basement. When the hole was done, the next step was to pass the cable without the connectors at the ends. I had to learn from youtube tutorials how to crimp an RJ45 cable and buy the necessary materials.
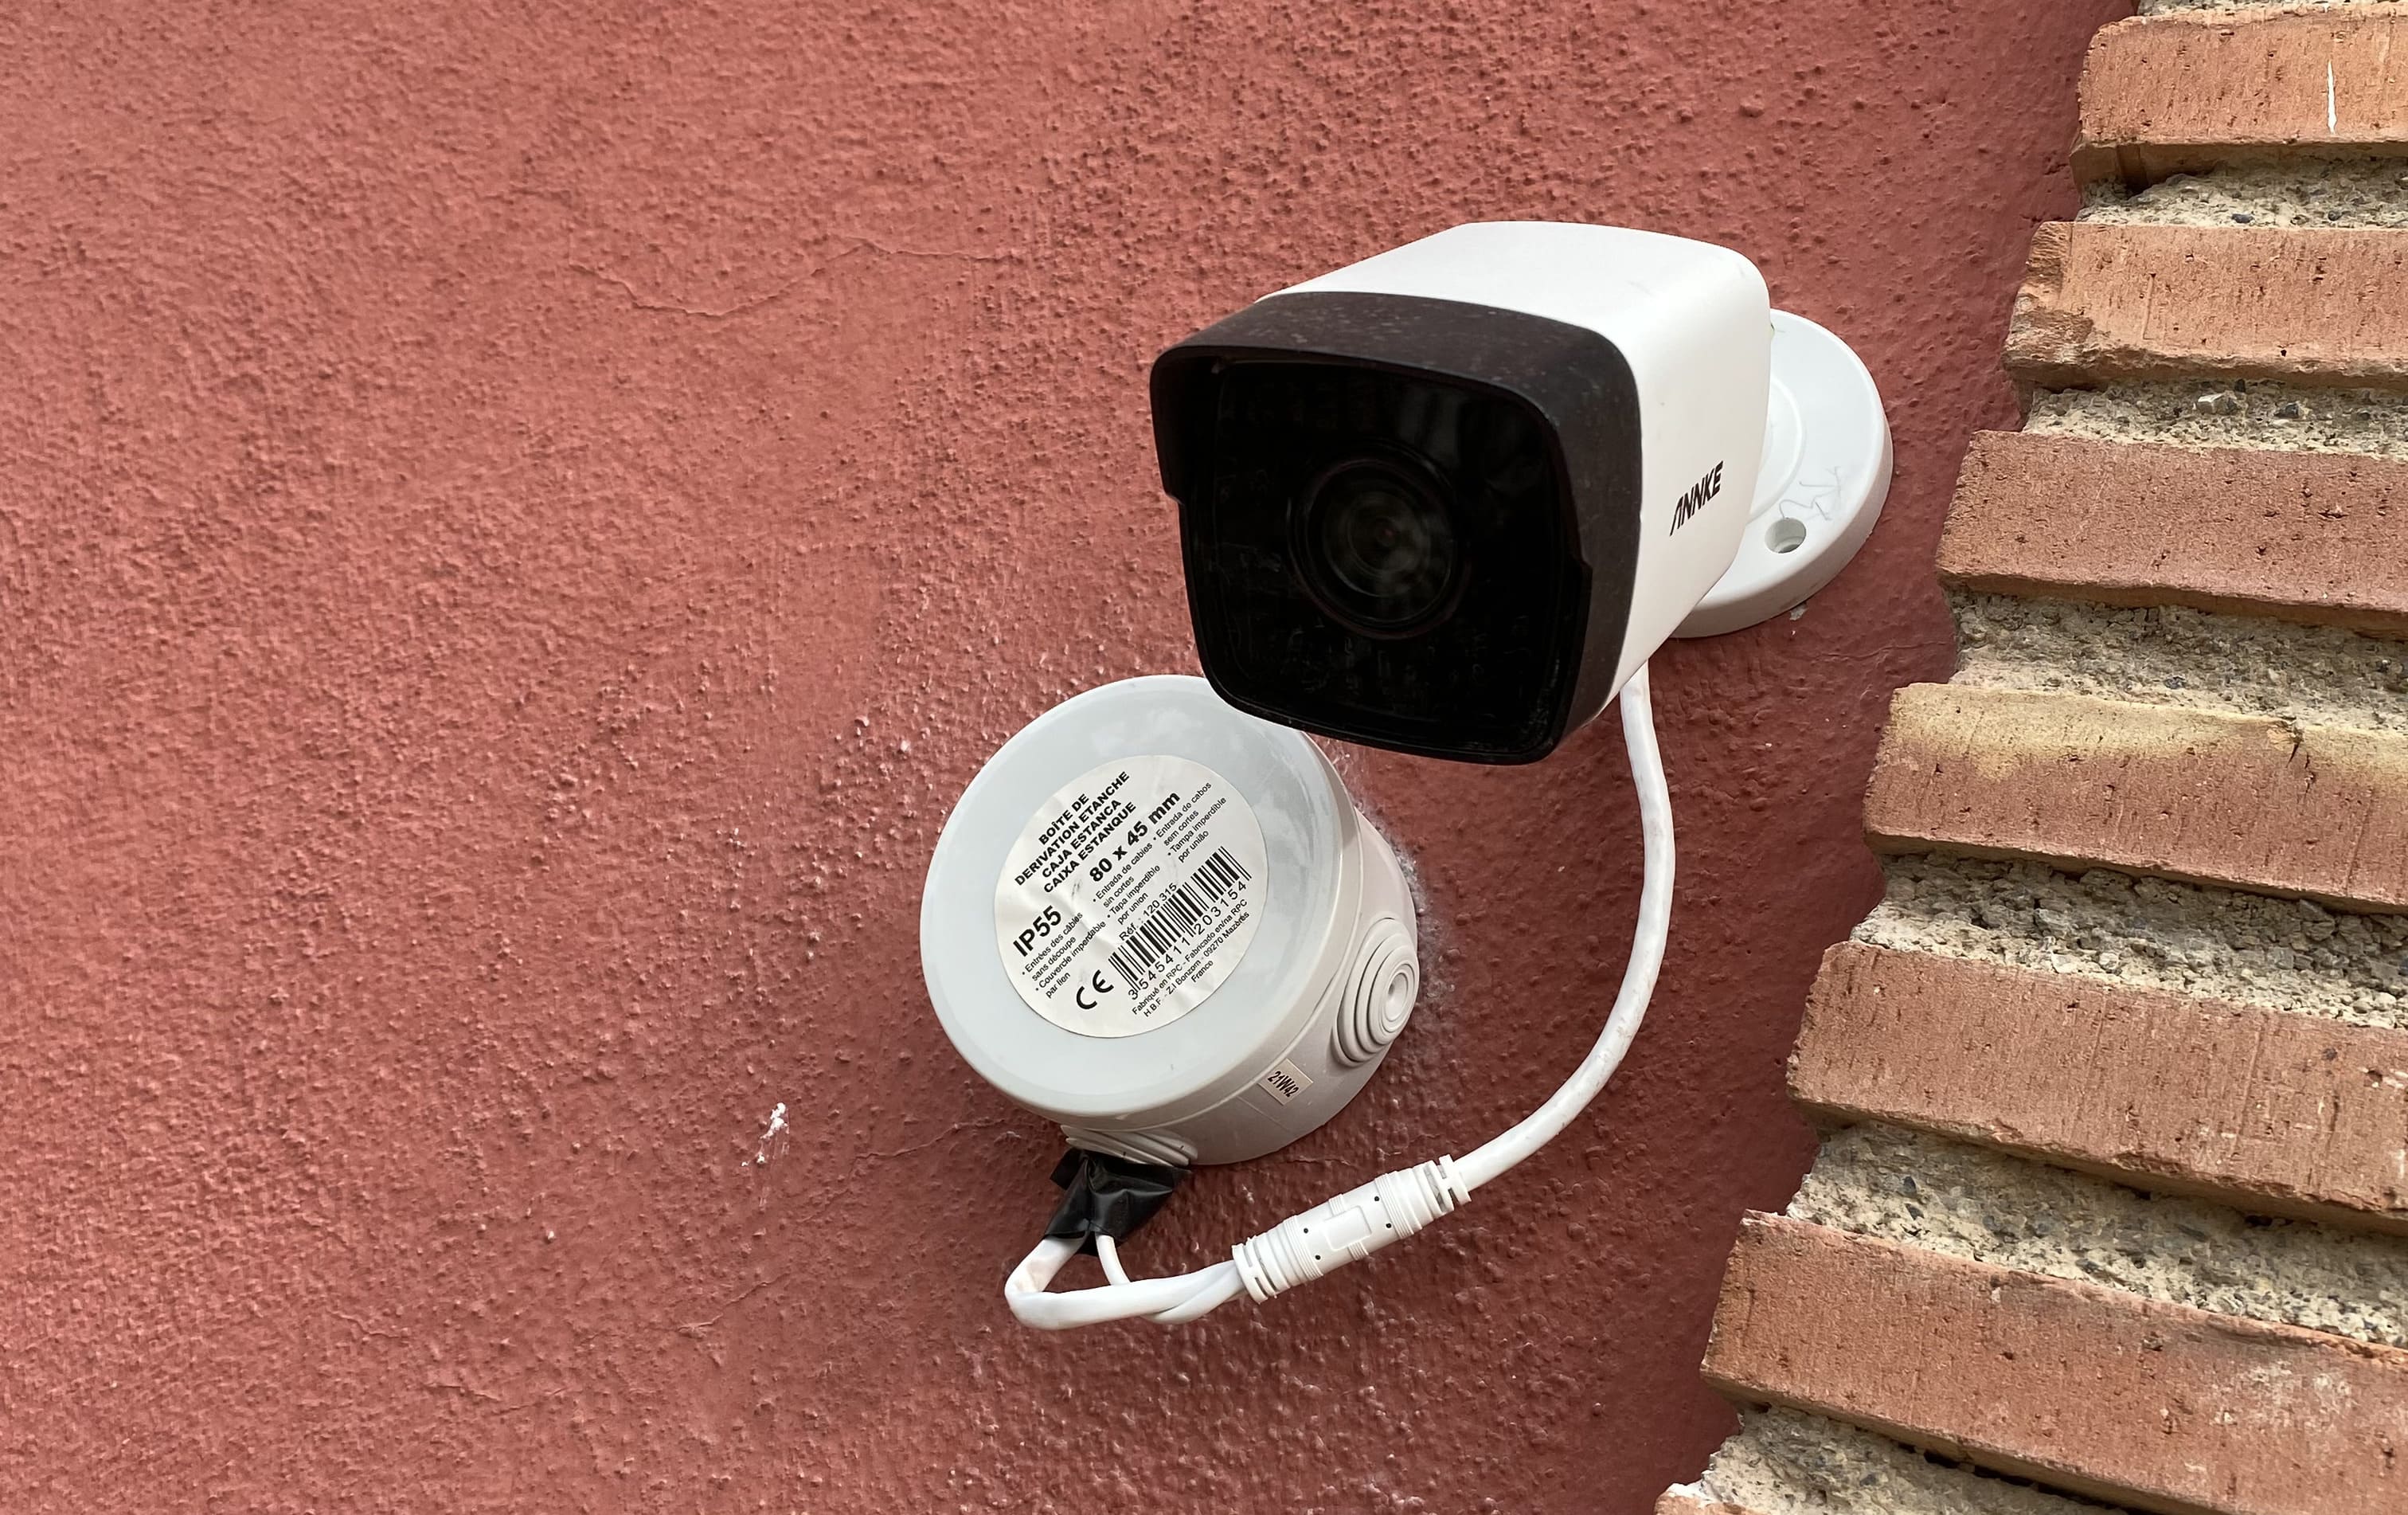
In this way, the inside of the room was solved, but it is still necessary to figure out how to organize the cables outside the wall. To do so, I used the cheapest waterproof junction box I found on amazon. Finally, it only remained to assemble everything. Sitting on the window very carefully and with the help of other person, we first screwed the junction box to the wall, and then the camera.
3. Result
We had quite a few problems, for example with the size of the screws and wall plugs, or also with the size of the junction box (the cables barely fit inside), among other things.
In spite of everything, the result has been a rudimentary, homemade, unprofessional but nevertheless very useful instalation, as since the day it was installed, the camera is recording at high definition 24 hours a the day directly to my NAS, with movement alerts and access from outside my home, everything managed and personalized by me. Also added to apple home thanks to homebridge being hosted on a raspberry pi, but that’s for another post. ✌️